mNo edit summary |
mNo edit summary Tag: Visual edit |
||
| (43 intermediate revisions by 14 users not shown) | |||
| Line 1: | Line 1: | ||
| + | {{CharacterInfobox |
||
| − | [[File:Wander.jpg|thumb|300px|Wander standing in the main hall of the [[Shrine of Worship]] ]] |
||
| + | |image = [[File:Wander.jpg|300px]] |
||
| ⚫ | |||
| + | |Gender = Male |
||
| + | |Appears = ''[[Shadow of the Colossus]]'' <br/> |
||
| + | ''[[The Ico & Shadow of the Colossus Collection]]'' |
||
| + | |Voiced = Kenji Nojima |Height = 1.7 m}}{{Template:Quote|''Poor ungodly soul.''|Lord Emon|about Wander}} |
||
| ⚫ | '''Wander''' (ワンダ ''Wanda'') is the protagonist of ''[[Shadow of the Colossus]]''. A young man with a clouded past, he travels to the [[Forbidden Lands]] on [[Agro|horseback]] in order to resurrect a girl named [[Mono]]. [[Dormin]], a mysterious voice presiding over the Lands' central [[Shrine of Worship|shrine]], gives Wander a deal: if he can slay the sixteen [[The Colossi|colossi]] that reside in the Lands, Mono will be resurrected. |
||
| + | |||
| + | ==Appearance== |
||
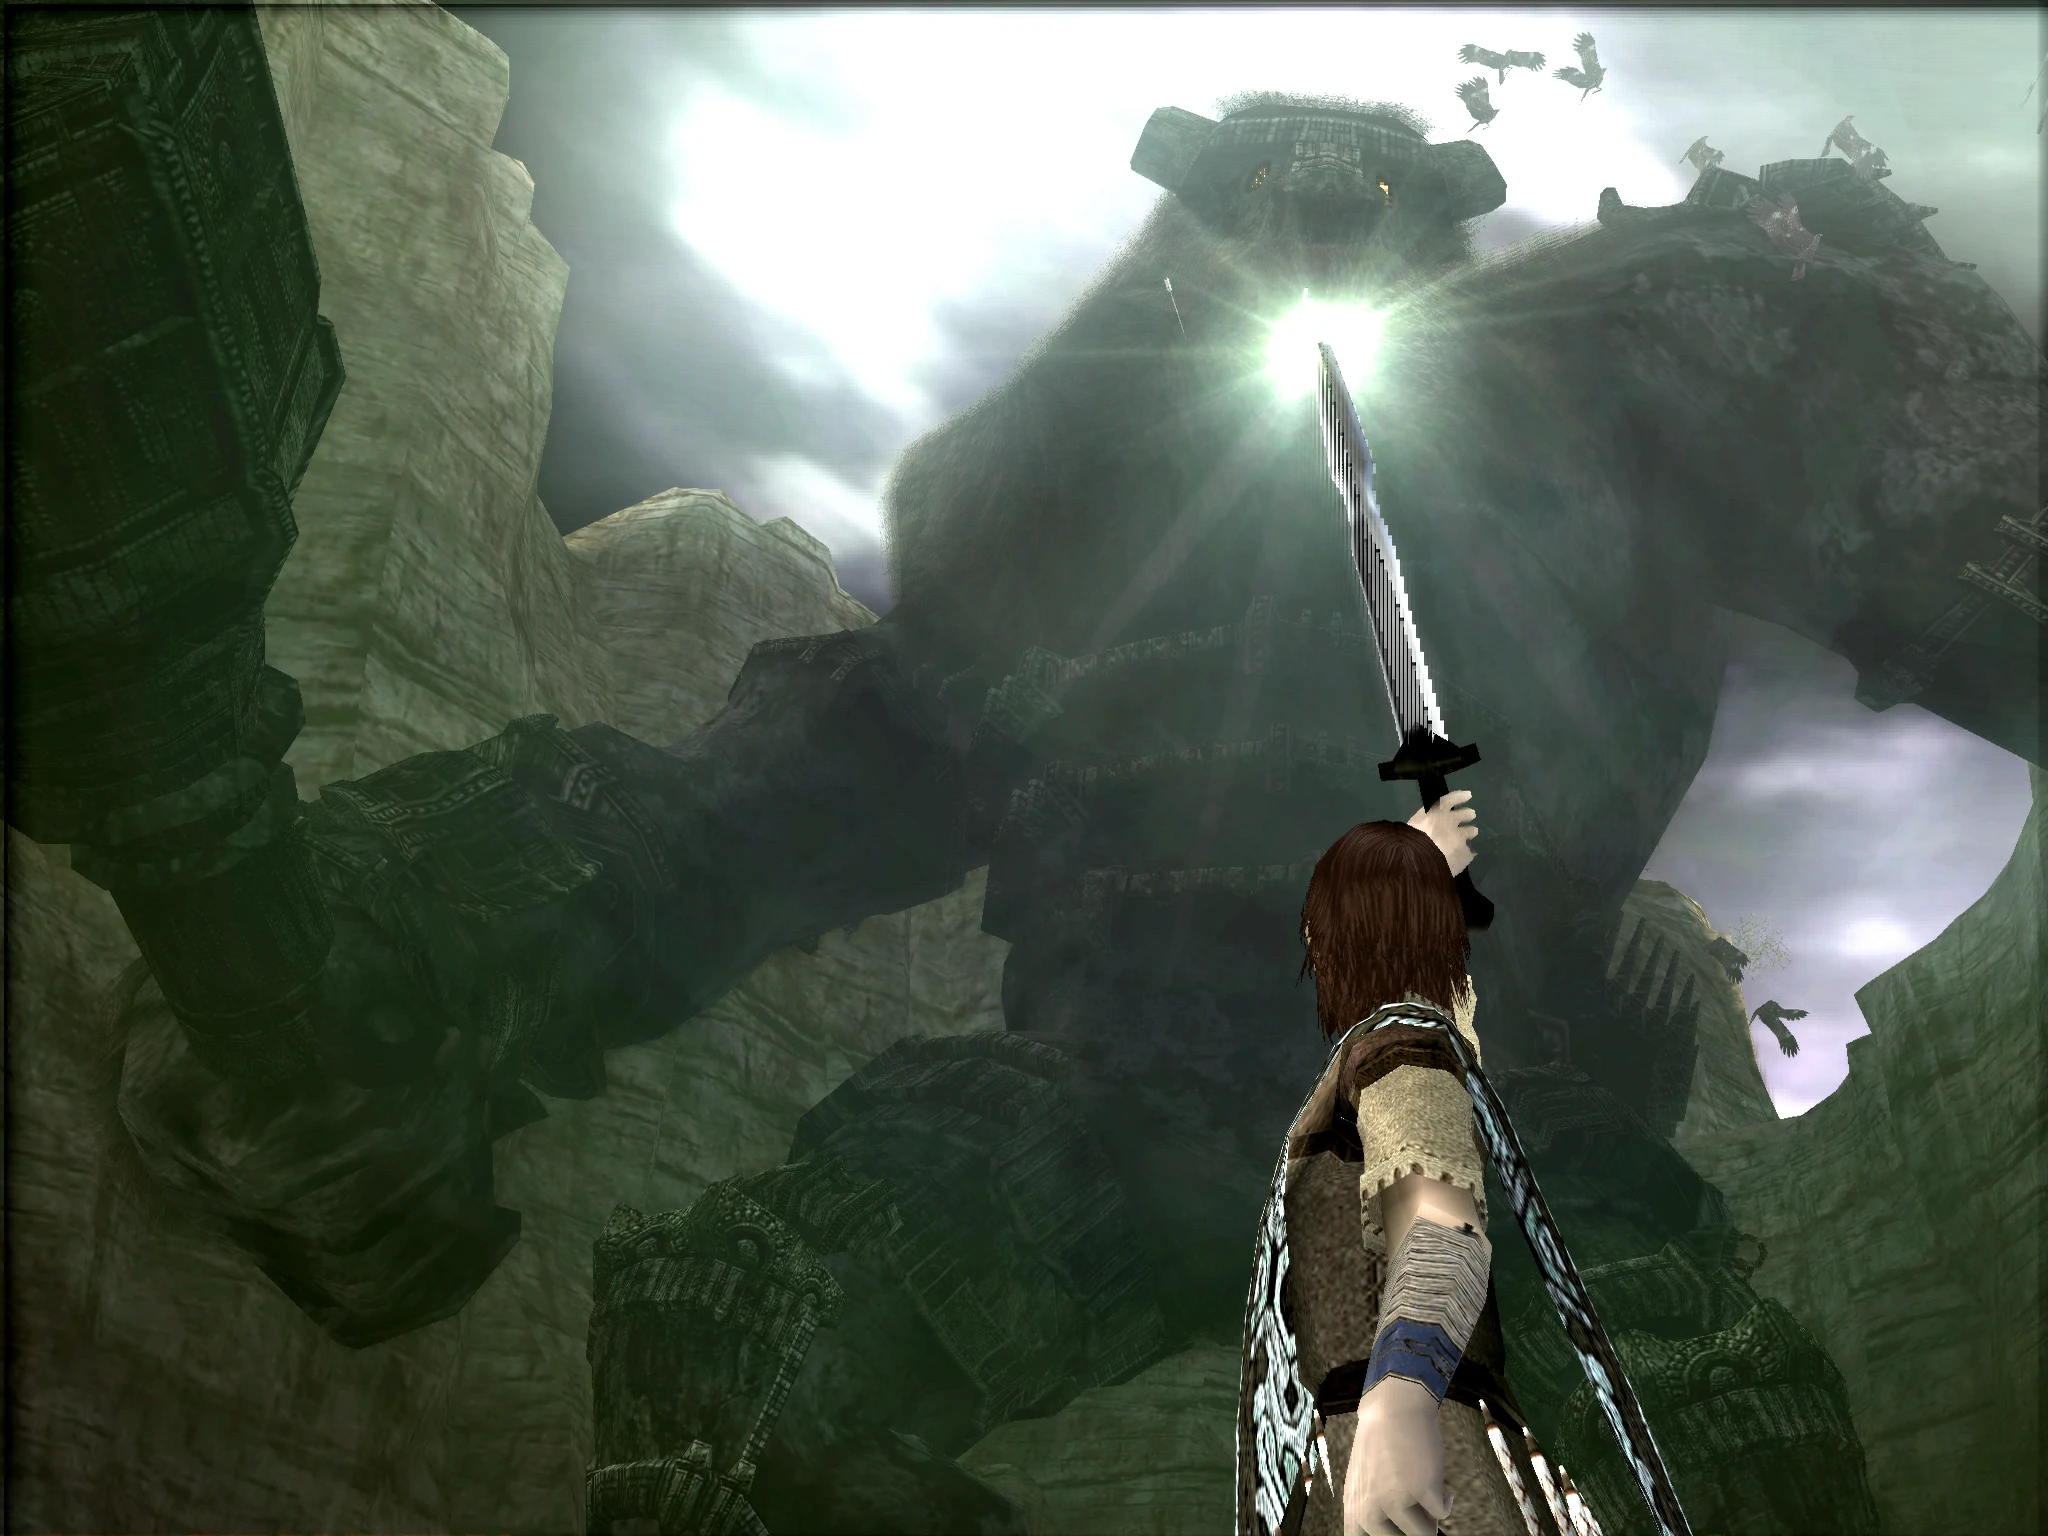
| + | [[File:SHADOW_OF_THE_COLOSSUS_20180310170651.jpg|thumb|280px|Wander raises the Ancient Sword.]]Wander has shoulder-length, red hair that is accessorized with a blue headband, as well as blue-gray eyes. He wears a short-sleeved shirt that varies in shades of brown, and over it sports a cloak with a symbol resembling the [[Magic Sigil|major sigils]] on the colossi. His arms are wrapped in bandages and blue wrist-guards. He also dons knee-length shorts that are a faded green and blue sandals with shin-guards. |
||
| + | |||
| + | [[File:SHADOW_OF_THE_COLOSSUS_20180220120013.jpg|thumb|280px|Wander's clothes as seen in the game's PS4 remake.]]Over the course of the game, his appearance slightly changes with every four colossi that are defeated. His clothes will become dirtier, his skin paler, his hair will darken, and markings will appear on his body. He also begins to grow a small pair of horns on his head. |
||
==Background== |
==Background== |
||
| − | Wander's past is unspecified in the game, but he appears to be from the same tribe or social group as [[Lord Emon]], and he was |
+ | [[File:3dwa34(2).jpg|thumb|Wander's Clothes as seen in the game's PS3 remaster.]]Wander's past is unspecified in the game, but he appears to be from the same tribe or social group as [[Lord Emon]], and he was somehow involved with a girl named Mono. He is an excellent horseman, able to navigate difficult terrain as well as turn in the saddle and even stand up while at full gallop. The familiarity with which he holds a [[Bow & Arrow|bow]] and uses it on horseback also testifies to his experience with that weapon. However, some have pointed out that Wander's skills with the [[Ancient Sword|sword]] are apparently negligible; even when swinging his sword without the challenge of an opponent before him, Wander's blows are slow and clumsy. Wander's greatest strength, then, is his tenacity. Although perhaps not the best warrior, he is determined to save Mono at any cost and will stop at nothing to defeat the colossi that stand between him and Mono's resurrection. |
==Story== |
==Story== |
||
| + | [[File:Colossus01 06.jpg|thumb|left|240px|Wander facing his [[Valus|first opponent]].]] |
||
| − | The game opens with Wander riding on [[Agro]] down a narrow mountain trail and across the bridge to The Forbidden Lands, with Mono's body in his arms. We are later told that he stole his sword from Lord Emon, believing that if he brought it to the valley he would be able to save Mono. When he arrives at the shrine in the center of the lands, he lays Mono on an altar, and then several shadowy figures emerge from the ground. Beams of light from Wander's sword dispel the creatures, however, and then a disembodied voice from beyond the chamber's vaulted ceiling speaks to Wander. The voice's owner introduces itself as [[Dormin]], and expresses surprise that Wander possesses the sword. Wander explains his quest, and he and Dormin make a deal: if Wander can slay the 16 colossi living in the Forbidden Lands, Dormin will resurrect Mono. Dormin warns Wander that the price to save her may be extremely high, to which Wander responds "it doesn't matter." |
||
| + | The story of Wander begins with him entering the Forbidden Lands, traveling across the long bridge at its entrance on his horse Agro. Prior to entering, he had stolen a magical sword, which is the only weapon capable of slaying the colossi of the Forbidden Lands. |
||
| − | Wander's appearance deteriorates subtly over the course of the game, representing both his fights with the colossi and the reunion of Dormin's essence within him. His skin becomes paler and becomes etched with black streaks, his hair loses its redish brown color and turns black, and his clothes become dirty and stained. By the time [[Lord Emon]]'s company arrive, Wander is a little more than a member of the walking dead. Emon's men attempt to destroy what is left of him, but they are too late to stop the growing shadow. Dormin, once resurrected, reveals he had planned to use Wander's body as a vessel for his resurrection. |
||
| + | Led to the massive Shrine of Worship at the center of the region, Wander carries with him a body wrapped in a cloak, which he lays upon an altar in the shrine. Removing the cloak, the body of a barefoot maiden named Mono is revealed. A moment later, several [[shadow creatures]] with humanoid forms appear and prepare to attack Wander, but he easily dismisses them with a wave of the Ancient Sword in his possession, which emits beams of light. After vanquishing the shadow creatures, the voice of the disembodied entity known as [[Dormin]] echoes from above, expressing surprise that Wander possesses the weapon. Wander requests that Dormin return Mono's soul to her body, which it states may be possible, but only if the sixteen idols lining the temple's hall are destroyed. It explains that this task can only be accomplished by using the ancient sword to kill sixteen colossi located throughout the land. |
||
| − | In the end, Wander and Dormin are both sucked into a massive vortex created by Emon from the power of the sword Wander carried with him. The only thing left in the vortex's wake is a small infant with horns growing from its head, which a resurrected Mono takes with her to the [[Shrine of Worship#The garden|garden]] nestled high in the [[Shrine of Worship]]. |
||
| + | |||
| + | Despite a warning from Dormin that he may have to pay a great price to revive Mono, Wander sets out to search the land for the colossi and destroy them. In a sequence after the [[Kuromori|eighth]] colossus is slain, a deterioration of Wander's body is shown clearly: his skin becoming paler, his hair darker, and dark streaks growing across his face. Also in the sequence, Wander envisions as if in a dream that Mono awakens and calls out to him, yet as he attempts to approach her, he is quickly dragged away. Meanwhile, Mono's complexion improves and her voice can be faintly heard after each colossus has been killed. After the death of the [[Pelagia|twelfth]], it is revealed that Wander is being pursued by a group of warriors led by Lord Emon. |
||
| + | |||
| + | [[File:WanderStabbed.jpg|thumb|240px|Wander getting stabbed in the chest by one of Lord Emon's men.]] |
||
| + | |||
| + | Urged to hurry with his task by Dormin, Wander soon heads off to defeat the [[Malus|sixteenth and final colossus]]. On the way to this confrontation, he travels on horseback across a long bridge, which begins to collapse as he is halfway across. As Agro jumps over the last gap in the bridge, the portion she lands on begins to separate from its foundation, causing her to nearly lose her footing. Sensing the impending fall, Agro jerks forward to throw Wander to safety on the other side, sacrificing herself and falling into the river hundreds of feet below as the bridge finally gives way. Wander goes on to defeat the final colossus, and Emon's company arrives at the Shrine of Worship just as the last idol crumbles; Wander appears soon afterwards, his eyes and skin now both entirely pale and two small horns protruding from his head. Declaring that Wander has been "possessed by the dead", Lord Emon orders his warriors to kill him. While he struggles to reach Mono, one warrior shoots Wander in the leg with a crossbow while another stabs him through his heart with a sword. Black blood sprays from the wound as Wander's body becomes covered in darkness and falls to the floor — a death identical to those suffered by the colossi. |
||
| + | |||
| + | Afterward, Dormin's spirit possesses Wander's body, transforming it into a shadowy giant. Dormin, now speaking in its masculine voice, explains that Lord Emon's ancestors had separated it into sixteen segments in order to seal away its power "for an eternity". While his men flee, Lord Emon casts the Ancient Sword into a small pool at the back of the shrine's hall, creating a whirlwind of light that consumes Dormin, and despite the player's ability to control his attempts to escape, ultimately Wander is sucked in as well. Emon and his men flee the Forbidden Lands as the bridge connecting to the temple collapses behind them. As they safely arrive at the entrance to the Forbidden Lands, Emon expresses hope that if Wander survived, he will someday be able to atone for his crimes. |
||
| + | |||
| + | In the Shrine of Worship, Mono awakens, restored by Dormin in accordance with its agreement with Wander, and Agro limps into the shrine with an injured hind leg. Mono follows her to the pool into which Wander and Dormin were pulled by Emon's spell, finding a male infant with tiny horns on his head. She takes the baby Wander with her, following the horse to higher levels of the Shrine of Worship, and arrives at a [[Secret Garden|secret garden]] within the shrine as the game ends. |
||
| + | |||
| + | ==Controls== |
||
| + | <center><div style="background:#FFFFFF; border:#AAAAAA solid 2px; -moz-border-radius: 3px; padding:0em; width:600px;"> |
||
| + | {| border="0" cellspacing="0" cellpadding="1" align="center" width="600" |
||
| + | |- align="center" bgcolor="#8DBCB4" |
||
| + | | colspan="2" | <big>'''Basic Controls'''</big> |
||
| + | |- align="center" bgcolor="#DDDDDD" |
||
| + | ! Action |
||
| + | ! Controls |
||
| + | |- align="center" bgcolor="#FFFFFF" |
||
| + | | width="200" | Movement |
||
| + | | width="400" bgcolor="#FFFFFF" | Left Stick (also aim with bow) |
||
| + | |- align="center" bgcolor="#F0F0F0" |
||
| + | | Jump |
||
| + | | {{Triangle}} (hold for higher)<br>{{Triangle}} + {{Square}} (swing sword midair)<br>{{Triangle}} + hold {{R1}} + {{Square}} (stab down) |
||
| + | |- bgcolor="#DDDDDD" |
||
| + | | colspan="2" | <!------------Separator-------------> |
||
| + | |- align="center" bgcolor="#FFFFFF" |
||
| + | | Call Agro/Colossus attention |
||
| + | | bgcolor="#FFFFFF" | {{X}} (result varies by distance) |
||
| + | |- align="center" bgcolor="#F0F0F0" |
||
| + | | Attack |
||
| + | | {{Square}} |
||
| + | |- bgcolor="#DDDDDD" |
||
| + | | colspan="2" | <!------------Separator-------------> |
||
| + | |- align="center" bgcolor="#FFFFFF" |
||
| + | | Grab/Hold on/Crouch |
||
| + | | bgcolor="#FFFFFF" | {{R1}}<br>{{R1}} + control stick (creep)<br>{{R1}} + {{Square}} (charge sword attack), then {{Square}} (stab down) |
||
| + | |- align="center" bgcolor="#F0F0F0" |
||
| + | | Dive Roll |
||
| + | | {{R1}} + {{Triangle}} |
||
| + | |- align="center" bgcolor="#FFFFFF" |
||
| + | | Mount Agro |
||
| + | | bgcolor="#FFFFFF" | {{Triangle}} while next to Agro |
||
| + | |- align="center" bgcolor="#F0F0F0" |
||
| + | | Interact w/ environment |
||
| + | | {{Circle}} |
||
| + | |- align="center" bgcolor="#D67F62" |
||
| + | | colspan="2" | <big>'''Weapons'''</big> |
||
| + | |- align="center" bgcolor="#DDDDDD" |
||
| + | ! Action |
||
| + | ! Controls (Directional Pad) |
||
| + | |- align="center" bgcolor="#FFFFFF" |
||
| + | | Next Weapons |
||
| + | | bgcolor="#FFFFFF" | → |
||
| + | |- align="center" bgcolor="#F0F0F0" |
||
| + | | Previous Weapon |
||
| + | | ← |
||
| + | |- align="center" bgcolor="#FFFFFF" |
||
| + | | Stow weapon |
||
| + | | bgcolor="#FFFFFF" | ↓ |
||
| + | |- bgcolor="#DDDDDD" |
||
| + | | colspan="2" | <!------------Separator-------------> |
||
| + | |- align="center" bgcolor="#F0F0F0" |
||
| + | | Draw weapon |
||
| + | | ↑ |
||
| + | |} |
||
| + | </div></center> |
||
==Notes== |
==Notes== |
||
| − | *The player has minor control over the infant |
+ | *The player has minor control over the infant once it appears on the screen during the credits. By pressing the {{R1}} and action buttons, he will cry in a variety of ways. This confirms that the baby is in fact Wander. |
==Gallery== |
==Gallery== |
||
| − | <gallery heights="180px" perrow="3" orientation="none" spacing="small" |
+ | <gallery heights="180px" perrow="3" orientation="none" spacing="small" columns="dynamic" widths="200" position="center"> |
| ⚫ | |||
| ⚫ | |||
| ⚫ | |||
| ⚫ | |||
Wander 4.jpg|Wander's character profile page in the official artbook. |
Wander 4.jpg|Wander's character profile page in the official artbook. |
||
| − | + | WanderCloseUp.jpg|Close up of Wander's face at the beginning of the game. |
|
| ⚫ | |||
| ⚫ | |||
| + | WanderEnding.jpg|Wander as he appears after defeating all the colossi. |
||
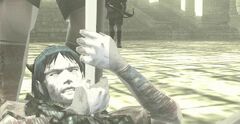
Babysotc.png|The horned baby Wander in the arms of Mono. |
Babysotc.png|The horned baby Wander in the arms of Mono. |
||
| ⚫ | |||
| ⚫ | |||
</gallery> |
</gallery> |
||
| − | {{ |
+ | {{Franchise}} |
| + | {{SotCWalkthrough}} |
||
| + | [[Category:Shadow of the Colossus Characters]] |
||
[[Category:Characters]] |
[[Category:Characters]] |
||
| + | [[Category:Shadow of the Colossus]] |
||
Revision as of 20:04, 10 September 2020
| “ | Poor ungodly soul. | ” |
–Lord Emon, about Wander | ||
Wander (ワンダ Wanda) is the protagonist of Shadow of the Colossus. A young man with a clouded past, he travels to the Forbidden Lands on horseback in order to resurrect a girl named Mono. Dormin, a mysterious voice presiding over the Lands' central shrine, gives Wander a deal: if he can slay the sixteen colossi that reside in the Lands, Mono will be resurrected.
Appearance


Wander raises the Ancient Sword.
Wander has shoulder-length, red hair that is accessorized with a blue headband, as well as blue-gray eyes. He wears a short-sleeved shirt that varies in shades of brown, and over it sports a cloak with a symbol resembling the major sigils on the colossi. His arms are wrapped in bandages and blue wrist-guards. He also dons knee-length shorts that are a faded green and blue sandals with shin-guards.
Wander's clothes as seen in the game's PS4 remake.
Over the course of the game, his appearance slightly changes with every four colossi that are defeated. His clothes will become dirtier, his skin paler, his hair will darken, and markings will appear on his body. He also begins to grow a small pair of horns on his head.
Background
.jpg)
Wander's Clothes as seen in the game's PS3 remaster.
Wander's past is unspecified in the game, but he appears to be from the same tribe or social group as Lord Emon, and he was somehow involved with a girl named Mono. He is an excellent horseman, able to navigate difficult terrain as well as turn in the saddle and even stand up while at full gallop. The familiarity with which he holds a bow and uses it on horseback also testifies to his experience with that weapon. However, some have pointed out that Wander's skills with the sword are apparently negligible; even when swinging his sword without the challenge of an opponent before him, Wander's blows are slow and clumsy. Wander's greatest strength, then, is his tenacity. Although perhaps not the best warrior, he is determined to save Mono at any cost and will stop at nothing to defeat the colossi that stand between him and Mono's resurrection.
Story

Wander facing his first opponent.
The story of Wander begins with him entering the Forbidden Lands, traveling across the long bridge at its entrance on his horse Agro. Prior to entering, he had stolen a magical sword, which is the only weapon capable of slaying the colossi of the Forbidden Lands.
Led to the massive Shrine of Worship at the center of the region, Wander carries with him a body wrapped in a cloak, which he lays upon an altar in the shrine. Removing the cloak, the body of a barefoot maiden named Mono is revealed. A moment later, several shadow creatures with humanoid forms appear and prepare to attack Wander, but he easily dismisses them with a wave of the Ancient Sword in his possession, which emits beams of light. After vanquishing the shadow creatures, the voice of the disembodied entity known as Dormin echoes from above, expressing surprise that Wander possesses the weapon. Wander requests that Dormin return Mono's soul to her body, which it states may be possible, but only if the sixteen idols lining the temple's hall are destroyed. It explains that this task can only be accomplished by using the ancient sword to kill sixteen colossi located throughout the land.
Despite a warning from Dormin that he may have to pay a great price to revive Mono, Wander sets out to search the land for the colossi and destroy them. In a sequence after the eighth colossus is slain, a deterioration of Wander's body is shown clearly: his skin becoming paler, his hair darker, and dark streaks growing across his face. Also in the sequence, Wander envisions as if in a dream that Mono awakens and calls out to him, yet as he attempts to approach her, he is quickly dragged away. Meanwhile, Mono's complexion improves and her voice can be faintly heard after each colossus has been killed. After the death of the twelfth, it is revealed that Wander is being pursued by a group of warriors led by Lord Emon.

Wander getting stabbed in the chest by one of Lord Emon's men.
Urged to hurry with his task by Dormin, Wander soon heads off to defeat the sixteenth and final colossus. On the way to this confrontation, he travels on horseback across a long bridge, which begins to collapse as he is halfway across. As Agro jumps over the last gap in the bridge, the portion she lands on begins to separate from its foundation, causing her to nearly lose her footing. Sensing the impending fall, Agro jerks forward to throw Wander to safety on the other side, sacrificing herself and falling into the river hundreds of feet below as the bridge finally gives way. Wander goes on to defeat the final colossus, and Emon's company arrives at the Shrine of Worship just as the last idol crumbles; Wander appears soon afterwards, his eyes and skin now both entirely pale and two small horns protruding from his head. Declaring that Wander has been "possessed by the dead", Lord Emon orders his warriors to kill him. While he struggles to reach Mono, one warrior shoots Wander in the leg with a crossbow while another stabs him through his heart with a sword. Black blood sprays from the wound as Wander's body becomes covered in darkness and falls to the floor — a death identical to those suffered by the colossi.
Afterward, Dormin's spirit possesses Wander's body, transforming it into a shadowy giant. Dormin, now speaking in its masculine voice, explains that Lord Emon's ancestors had separated it into sixteen segments in order to seal away its power "for an eternity". While his men flee, Lord Emon casts the Ancient Sword into a small pool at the back of the shrine's hall, creating a whirlwind of light that consumes Dormin, and despite the player's ability to control his attempts to escape, ultimately Wander is sucked in as well. Emon and his men flee the Forbidden Lands as the bridge connecting to the temple collapses behind them. As they safely arrive at the entrance to the Forbidden Lands, Emon expresses hope that if Wander survived, he will someday be able to atone for his crimes.
In the Shrine of Worship, Mono awakens, restored by Dormin in accordance with its agreement with Wander, and Agro limps into the shrine with an injured hind leg. Mono follows her to the pool into which Wander and Dormin were pulled by Emon's spell, finding a male infant with tiny horns on his head. She takes the baby Wander with her, following the horse to higher levels of the Shrine of Worship, and arrives at a secret garden within the shrine as the game ends.
Controls
| Basic Controls | |
| Action | Controls |
|---|---|
| Movement | Left Stick (also aim with bow) |
| Jump | |
| Call Agro/Colossus attention | |
| Attack | |
| Grab/Hold on/Crouch | |
| Dive Roll | |
| Mount Agro | |
| Interact w/ environment | |
| Weapons | |
| Action | Controls (Directional Pad) |
| Next Weapons | → |
| Previous Weapon | ← |
| Stow weapon | ↓ |
| Draw weapon | ↑ |
Notes
- The player has minor control over the infant once it appears on the screen during the credits. By pressing the
 and action buttons, he will cry in a variety of ways. This confirms that the baby is in fact Wander.
Gallery
")
")
")
")
")
")
")
")
| The game | ICO ( Demo · Revisions from U.S. version · Ico HD ) | |
| Characters | Ico · Yorda · The Queen · Shadows · Shinkan | |
| The Castle | Idol Gates · Yorda's language · Saving Benches Altar • Warehouse • Spiral Stairs • Old Bridge • Stairs • Trolley 1 • Trolley 2 • Crane • Chandelier • Drawbridge • Main Gate • Graveyard • Dark Room • Sunbeams • Stone Pillar • East Crag • East Arena • East Idol Stairs • East Reflector • Waterfall • Sluice • Cogwheel • Gondola • Water Tower • West Crag • West Arena • West Idol Stairs • West Reflector • Cage • Pipe • Elevator • Wharf • Queen's Room • Sandy Beach | |
| Other Media | Ico ~Melody in the Mist~ · Official Game Guide · Ico: Castle in the Mist | |
 Walkthrough Walkthrough | |
|---|---|
| Characters | Wander · Mono · Agro · Dormin · Lord Emon · Guards · Shadows |
| Colossi | I · II · III · IV · V · VI · VII · VIII · IX · X · XI · XII · XIII · XIV · XV · XVI |
| Locations | The Forbidden Lands · Shrine of Worship · Colossus Arenas |
| Main Items | Power-ups (Lizards · Fruit) · Weapons (Ancient Sword · Sword of the Sun · Queen’s Sword · Sword of Dormin · Bow & Arrow · Ancient Bow · Harpoon of Thunder · Life Sword) · Collectibles (Relics) |
| Gameplay | Hard Mode · Save shrines · Time Attack · Reminiscence Mode · Watermellon · Barrel |
| Media | Roar of the Earth (OST) · Official Art and Guide Book · Nico Bonus DVD · Film · Interview Archive |
| Releases | OPM Demo · PS2 original · PS3 remaster · PS4 remake · Credits |
| Early Builds | Preview version · PSU Preview version · E3 Demo |
| Unused Content | Unused Colossi · Colossus Test Stages · Unused Locations · Beta Mountains · Development Timeline of Shadow of the Colossus |