m (→Trivia) Tag: Visual edit |
(Removed sigil in footer.) |
||
| (14 intermediate revisions by 6 users not shown) | |||
| Line 4: | Line 4: | ||
|ColossusText2 =<p style="text-align: center;">Finally, the last colossus...<br/>The ritual is nearly over...<br/>Thy wish is nearly granted...<br/>But someone now stands to get in thy way...<br/>Make haste, for time is short... |
|ColossusText2 =<p style="text-align: center;">Finally, the last colossus...<br/>The ritual is nearly over...<br/>Thy wish is nearly granted...<br/>But someone now stands to get in thy way...<br/>Make haste, for time is short... |
||
|Colossi Type = |
|Colossi Type = |
||
| − | |Height = 196 |
+ | |Height = 196.8 feet (60 meters) |
|Weight = |
|Weight = |
||
|Location = |
|Location = |
||
| − | |Sigils = Normal: 1 |
+ | |Sigils = Normal: 1 major, 3 minor <br/> Hard: 1 major, 3 minor|Resemblance = |Time Attack = 9:30/13:00 (Original, PS3)<br/>9:30/10:45 (PS4)|Agro = No|Developer Nickname = Evis}} |
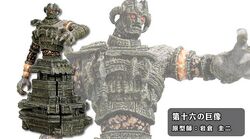
'''Malus''' is the nickname given to the sixteenth and final [[The Colossi|colossus]], found atop a great mesa on the southernmost tip of the [[The Forbidden Lands|Forbidden Lands]] ([[quadrant]] '''F8'''). Unlike the other fifteen colossi, Malus lies beyond an [[The Broken Seal|area]] that is inaccessible until the previous fifteen colossi are defeated. |
'''Malus''' is the nickname given to the sixteenth and final [[The Colossi|colossus]], found atop a great mesa on the southernmost tip of the [[The Forbidden Lands|Forbidden Lands]] ([[quadrant]] '''F8'''). Unlike the other fifteen colossi, Malus lies beyond an [[The Broken Seal|area]] that is inaccessible until the previous fifteen colossi are defeated. |
||
| − | ==Path to the |
+ | ==Path to the colossus== |
{{See also|:File:Map colossus 16.jpg|l1=Map for this path}} |
{{See also|:File:Map colossus 16.jpg|l1=Map for this path}} |
||
<div style="float:left;">{{VideoSotC |Video - Path to Malus|File:Shadow of the Colossus - 16th Colossus 1 2}}</div> |
<div style="float:left;">{{VideoSotC |Video - Path to Malus|File:Shadow of the Colossus - 16th Colossus 1 2}}</div> |
||
| − | The [[Ancient Sword|sword's]] light will point due south, just like it did at the [[Valus|very beginning]]. The destination is much farther to the south, however. Start by going into the canyon passage just east of where the sword is pointing, as if going to [[Kuromori]]. Take a right when the path forks this time and the [[Southern Plain|southern plains]] will be found. |
+ | The [[Ancient Sword|sword's]] light will point due south, just like it did at the [[Valus|very beginning]]. The destination is much farther to the south, however. Start by going into the canyon passage just east of where the sword is pointing, as if going to [[Kuromori]]. Take a right when the path forks this time and the [[Southern Plain|southern plains]] will be found. The sword will point to a distant mountain range - specifically, to a sealed door in the middle of the cliffs. |
This door can only be opened by shining all eight beams of the sword's light on the seal in the middle of the door. For obvious reasons, the door thus cannot be opened until this point in the game. Once it opens, proceed, although it is highly recommended to visit the [[Save shrines|save shrine]] a short ways down the path. |
This door can only be opened by shining all eight beams of the sword's light on the seal in the middle of the door. For obvious reasons, the door thus cannot be opened until this point in the game. Once it opens, proceed, although it is highly recommended to visit the [[Save shrines|save shrine]] a short ways down the path. |
||
| Line 24: | Line 24: | ||
Start climbing the ridged walls. Maneuver up to the grass walls and climb up, then east. Once on solid ground again, find and enter the tunnel leading farther upwards. |
Start climbing the ridged walls. Maneuver up to the grass walls and climb up, then east. Once on solid ground again, find and enter the tunnel leading farther upwards. |
||
| − | The storm is now in full swing as the player emerges outside onto a balcony. From here, the fifteen pillars of light where each colossus once stood can be seen, as can Wander's final opponent. |
+ | The storm is now in full swing as the player emerges outside onto a balcony. From here, the fifteen pillars of light where each colossus once stood can be seen, as can Wander's final opponent. Head up to the top of the mesa and climb either of the two ridged pillars on the sides of the balcony. As Wander slowly emerges from the canyon, a full view of the final boss is achieved. |
==Walkthrough== |
==Walkthrough== |
||
| + | |||
<div style="float:left;">{{VideoSotC |Video - Battle with Malus|File:Shadow of the Colossus - 16th Colossus 2 2}}</div> |
<div style="float:left;">{{VideoSotC |Video - Battle with Malus|File:Shadow of the Colossus - 16th Colossus 2 2}}</div> |
||
The last colossus is absolutely immense, even from the other side of the mesa where Wander begins. This is the only colossus that does not move, but what it lacks in mobility it makes up for in firepower. As soon as Wander walks up the steps leading to the battlefield, Malus will shoot deadly, high-speed projectiles at him from across the mesa, preventing him from approaching it directly. These make a distinct hissing sound when they are shot, but sometimes they can be hard to hear over the storm. Find cover quickly, or prepare to lose a huge amount of health. |
The last colossus is absolutely immense, even from the other side of the mesa where Wander begins. This is the only colossus that does not move, but what it lacks in mobility it makes up for in firepower. As soon as Wander walks up the steps leading to the battlefield, Malus will shoot deadly, high-speed projectiles at him from across the mesa, preventing him from approaching it directly. These make a distinct hissing sound when they are shot, but sometimes they can be hard to hear over the storm. Find cover quickly, or prepare to lose a huge amount of health. |
||
| Line 34: | Line 35: | ||
[[Image:EarlyMalusBattleConcept.jpg|thumb|right|256px|A concept version of this battle had Malus at the center of the arena. Wander had to reach the colossus through a maze of tunnels, with the occasional opening where Malus could shoot through. The design was ultimately scrapped in favor of a linear approach, but several elements of this early design can still be seen in the final game.]] |
[[Image:EarlyMalusBattleConcept.jpg|thumb|right|256px|A concept version of this battle had Malus at the center of the arena. Wander had to reach the colossus through a maze of tunnels, with the occasional opening where Malus could shoot through. The design was ultimately scrapped in favor of a linear approach, but several elements of this early design can still be seen in the final game.]] |
||
| − | The next part is challenging |
+ | The next part is challenging: Wander must make his way up the ledge and behind the nearby cover without getting hit. Malus will shoot at him if he's hanging onto the ledge, but the projectile will miss. Use the opportunity to pull Wander up quickly and dive next to the wall, which should be reached right as another bolt hits. From here, make haste west from cover to cover; any mistake will knock Wander back into the trenches and damage him significantly. Health naturally regenerates slowly on its own, but if Wander crouches, it will regenerate faster. Dive into the hole at the end. |
This tunnel leads out onto the western edge of the mesa, where Wander must make his way across some narrow ledges. Jumping from a ledge that divides Wander and his path is necessary. Quickly run to the next tunnel entrance. At the end is a broken staircase leading to another series of walls. These are farther apart than the previous set (and much closer to the colossus), so Wander must run from and into cover very quickly. Using the dive roll just before getting there is highly recommended. |
This tunnel leads out onto the western edge of the mesa, where Wander must make his way across some narrow ledges. Jumping from a ledge that divides Wander and his path is necessary. Quickly run to the next tunnel entrance. At the end is a broken staircase leading to another series of walls. These are farther apart than the previous set (and much closer to the colossus), so Wander must run from and into cover very quickly. Using the dive roll just before getting there is highly recommended. |
||
| − | The tunnel here will bring Wander directly underneath the colossus, and it's time to climb. The bottom half of the colossus is climbed easily enough; just go from ledge to ledge, stopping to rest when Wander needs to regain grip strength. When Wander finally reaches the colossus' midsection, however, things get tricky. The Ancient Sword will indicate a [[Magic Sigil|vulnerable point]] on the colossus' back; stab it, and |
+ | The tunnel here will bring Wander directly underneath the colossus, and it's time to climb. The bottom half of the colossus is climbed easily enough; just go from ledge to ledge, stopping to rest when Wander needs to regain grip strength. When Wander finally reaches the colossus' midsection, however, things get tricky. The Ancient Sword will indicate a [[Magic Sigil|vulnerable point]] on the colossus' back; stab it, and Malus will try and reach its backside with its left hand. Jump from the [[fur]] on the colossus' backside to the fur on its left palm. Once accomplished, the boss will bring its hand back to where it was before, but now with the hero clinging on. Surprisingly, if Wander falls, he won't die, but rather loses a huge amount of life. Climb to the back of the colossus' hand and lightly stab it; this will make Malus hold out its hand with the palm side facing down, examining the pest. |
| − | The next goal is a minor sigil on Malus' upper left arm (again, the sword will pinpoint it). Stab this and Malus will try and cover this with its right hand. Jump off of its left arm and onto its right hand; hurry to the back of this hand and attack it to make the |
+ | The next goal is a minor sigil on Malus' upper left arm (again, the sword will pinpoint it). Stab this, and Malus will try and cover this with its right hand. Jump off of its left arm and onto its right hand; hurry to the back of this hand and attack it to make the enemy hold it flat. From here, shoot an [[Bow & Arrow|arrow]] onto the patch of fur on its shoulder, and Malus will cover this spot with the hand the player holds onto. All that remains is the final weakpoint, which is on the very top of its head. |
This is, of course, not an easy weakpoint to take out. Malus will try to shake Wander off very frequently and will often lean forward while doing so. Any slip here means a very long fall to the earth. There is only a single pause in Malus' fit where a full stab can be achieved, so don't even try until he stills (or see the final piece of tips and tricks); memorize his cycle. To make attacking this last weakpoint easier however, there is a useful trick. While on the colossus' shoulders, shoot or stab the patch of fur on its shoulder to make the colossus cover the injury with its hand again; this will leave its head perfectly still for a good few seconds. Its shoulders are a good place to recover stamina, even when the giant does everything in its power to shake Wander off. |
This is, of course, not an easy weakpoint to take out. Malus will try to shake Wander off very frequently and will often lean forward while doing so. Any slip here means a very long fall to the earth. There is only a single pause in Malus' fit where a full stab can be achieved, so don't even try until he stills (or see the final piece of tips and tricks); memorize his cycle. To make attacking this last weakpoint easier however, there is a useful trick. While on the colossus' shoulders, shoot or stab the patch of fur on its shoulder to make the colossus cover the injury with its hand again; this will leave its head perfectly still for a good few seconds. Its shoulders are a good place to recover stamina, even when the giant does everything in its power to shake Wander off. |
||
| Line 46: | Line 47: | ||
Once the last sigil is destroyed, Malus will be no more. The final opponent defeated, Wander's goal accomplished and journey over, sit back and enjoy the ending and credits. |
Once the last sigil is destroyed, Malus will be no more. The final opponent defeated, Wander's goal accomplished and journey over, sit back and enjoy the ending and credits. |
||
| − | :'''[[Time Attack]] times (Normal, Hard):''' 9:30, 13:00 |
+ | :'''[[Time Attack]] times in [[Shadow of the Colossus|Original]] and [[The ICO and Shadow of the Colossus Collection|PS3]] versions (Normal, Hard):''' 9:30, 13:00 |
| + | :'''Time Attack times in [[Shadow of the Colossus (PS4)|PS4 Remaster]] (Normal, Hard):''' 9:30/10:45 |
||
==Weakspots== |
==Weakspots== |
||
| + | |||
<div style="background:#FFFFFF; border:#C9C9C9 solid 1px; -moz-border-radius: 2px; padding:0em; width:400px;"> |
<div style="background:#FFFFFF; border:#C9C9C9 solid 1px; -moz-border-radius: 2px; padding:0em; width:400px;"> |
||
{| border="0" cellpadding="2" cellspacing="0" width="400" |
{| border="0" cellpadding="2" cellspacing="0" width="400" |
||
| Line 73: | Line 76: | ||
|} |
|} |
||
</div> |
</div> |
||
| + | |||
==Tips and tricks== |
==Tips and tricks== |
||
*Incredibly, it is actually possible [http://www.youtube.com/watch?v=7EEQ8KobwW0 to perform a very specific series of runs and jumps] that will allow the player to run right up to the colossus, dodging over a dozen fireballs on the way there. The move is extremely difficult to pull off, but will also save the player quite a bit of time in Time Attack if they're looking to break their old record by several minutes. |
*Incredibly, it is actually possible [http://www.youtube.com/watch?v=7EEQ8KobwW0 to perform a very specific series of runs and jumps] that will allow the player to run right up to the colossus, dodging over a dozen fireballs on the way there. The move is extremely difficult to pull off, but will also save the player quite a bit of time in Time Attack if they're looking to break their old record by several minutes. |
||
| − | *When on the fourth-largest section of Malus' garment discs, Wander is given an angle in which Malus' right shoulder [http://www.youtube.com/watch?v=ntP2ahpvt_k&t=1m21s can be shot from below |
+ | *When on the fourth-largest section of Malus' garment discs, Wander is given an angle in which Malus' right shoulder [http://www.youtube.com/watch?v=ntP2ahpvt_k&t=1m21s can be shot from below]. After shooting, Malus' right arm will extend closer to the ground, and upon climbing one level higher, the player will be able to jump directly to Malus' right hand on the return swing. This is also a great help in Time Attack. |
*Once the player is on Malus' left arm, it is possible to time its movement so that Wander can just jump onto its chest-plate or shoulder. It's actually far easier to perform than it sounds, and it is very helpful on Time Attack. |
*Once the player is on Malus' left arm, it is possible to time its movement so that Wander can just jump onto its chest-plate or shoulder. It's actually far easier to perform than it sounds, and it is very helpful on Time Attack. |
||
*When Wander is attacking the sigil on Malus' head, the player can align him in such a way that he can repeatedly stab the sigil without losing his footing even once. To do this, Wander must be facing directly forward (the same direction Malus is facing) and charge up a powerful stab. When Malus leans forward, prepare another stab. Then, when Malus is throwing its head back in an attempt to dislodge Wander, the stab will be almost fully charged; stab it again. This pattern can be repeated multiple times until the colossus is dead. |
*When Wander is attacking the sigil on Malus' head, the player can align him in such a way that he can repeatedly stab the sigil without losing his footing even once. To do this, Wander must be facing directly forward (the same direction Malus is facing) and charge up a powerful stab. When Malus leans forward, prepare another stab. Then, when Malus is throwing its head back in an attempt to dislodge Wander, the stab will be almost fully charged; stab it again. This pattern can be repeated multiple times until the colossus is dead. |
||
==Music== |
==Music== |
||
| − | *As Wander opens the gate leading to Malus, [ |
+ | *As Wander opens the gate leading to Malus, [https://www.youtube.com/watch?v=N_-R9sqFJnE "Sanctuary"] plays. |
| − | *When Agro sacrifices herself to save Wander, [ |
+ | *When Agro sacrifices herself to save Wander, [https://www.youtube.com/watch?v=6w1tR4tDyX8 "Resurrection"] plays. |
| − | *When approaching Malus, [ |
+ | *When approaching Malus, [https://www.youtube.com/watch?v=bfFvK1EYpsw "Demise of the Ritual"] plays. This song plays throughout the entire battle with Malus. |
==Trivia== |
==Trivia== |
||
| − | *Malus is the tallest of all the colossi by far; it |
+ | *Malus is the tallest of all the colossi by far; it is almost twice the height of the next-tallest colossi and over 30 times taller than Wander. Malus isn't the biggest colossus; [[Dirge]] is 260 ft/79.2m long, [[Hydrus]] is 280 ft/85.3m long, and [[Phalanx]] is 557 ft/169.8m long, making them all longer than Malus is tall. However, it is possible that Malus is the most massive and therefore the heaviest of all 16 colossi due not only to its great height but its enormous bulk. |
*To give Malus' great height some scale, if Malus were real, then it would be tall enough to be able to look directly into the clock face of [http://en.wikipedia.org/wiki/Big_Ben Big Ben]. |
*To give Malus' great height some scale, if Malus were real, then it would be tall enough to be able to look directly into the clock face of [http://en.wikipedia.org/wiki/Big_Ben Big Ben]. |
||
*Malus is the only stationary colossus; it seems that its feet are bolted in place. Even when Malus is thrashing to try and dislodge Wander, its lower body remains completely motionless. This idea of Malus' feet being fixed in place is further evidenced when Malus dies, as it doesn't fall over to the ground, but rather slumps and bends back as low as the stone garment will allow. If its feet weren't stuck in the ground, Malus would have definitely toppled over and fallen, much like the other colossi. |
*Malus is the only stationary colossus; it seems that its feet are bolted in place. Even when Malus is thrashing to try and dislodge Wander, its lower body remains completely motionless. This idea of Malus' feet being fixed in place is further evidenced when Malus dies, as it doesn't fall over to the ground, but rather slumps and bends back as low as the stone garment will allow. If its feet weren't stuck in the ground, Malus would have definitely toppled over and fallen, much like the other colossi. |
||
*Of all the colossi, Malus is the most remote and is located further south than any other. |
*Of all the colossi, Malus is the most remote and is located further south than any other. |
||
*The fight against Malus is the only battle which occurs in the rain. |
*The fight against Malus is the only battle which occurs in the rain. |
||
| − | *Malus is the last of four colossi that use long-range projectile attacks; not only is it unique in that it is the only bipedal colossus to attack in such a way, but it is also the only colossus that fires its long-range attack as singular shots. The other three colossi that use long-range projectiles (Kuromori, [[Basaran]], and [[Pelagia]]) will fire three or four shots in one attack, whereas Malus will only ever fire one shot at a time. At the same time, its projectiles are the only ones that |
+ | *Malus is the last of four colossi that use long-range projectile attacks; not only is it unique in that it is the only bipedal colossus to attack in such a way, but it is also the only colossus that fires its long-range attack as singular shots. The other three colossi that use long-range projectiles (Kuromori, [[Basaran]], and [[Pelagia]]) will fire three or four shots in one attack, whereas Malus will only ever fire one shot at a time. At the same time, its projectiles are the only ones that follow Wander. If the player can see them whilst moving, the projectiles even curve to change direction and strike Wander directly. |
| − | *Malus is the most human in appearance of all the colossi. This is probably for irony's sake; Wander has previously killed 15 monsters, deteriorating his appearance with each kill, and, by |
+ | *Malus is the most human in appearance of all the colossi. This is probably for irony's sake; Wander has previously killed 15 monsters, deteriorating his appearance with each kill, and, by dispatching Malus, the most human-looking, loses the last of his aesthetic humanity. |
| − | *As well as being the most human in appearance of all the colossi, Malus sounds the most human in its roars and bellows as well. |
+ | **As well as being the most human in appearance of all the colossi, Malus sounds the most human in its roars and bellows as well. |
| − | *Malus is the last of |
+ | *Malus is the last of three colossi that have their own exclusive track heard whilst fighting them. "Demise of the Ritual" is unique to Malus. |
*Malus is the only colossus where the initial scaling of it can be considered a puzzle, as the player must do different things to get on different parts of its body, until getting up to the head. While all other colossi have puzzles that involve getting on them, none of them have a puzzle that involves actually climbing them. |
*Malus is the only colossus where the initial scaling of it can be considered a puzzle, as the player must do different things to get on different parts of its body, until getting up to the head. While all other colossi have puzzles that involve getting on them, none of them have a puzzle that involves actually climbing them. |
||
*After Malus' intro movie, if Wander jumps to the lower ledges, the rain will vanish and the sky will be clear. |
*After Malus' intro movie, if Wander jumps to the lower ledges, the rain will vanish and the sky will be clear. |
||
*In Time Attack mode, the player can jump off and land on the bridge. |
*In Time Attack mode, the player can jump off and land on the bridge. |
||
*Malus is the only colossi to not fall to the ground upon defeat, aside from the ones fought in, (or in [[Avion|Avion's]] case, above) the water. |
*Malus is the only colossi to not fall to the ground upon defeat, aside from the ones fought in, (or in [[Avion|Avion's]] case, above) the water. |
||
| − | *After Wander surfaces from the final tunnel |
+ | *After Wander surfaces from the final tunnel (the one that brings him directly under Malus), it can be seen that its legs are made of an odd black and yellow energy substance. Attacking these will result in one of its lightning meteor attacks being shot at Wander from its hand (meaning it shoots through its "stone garment") |
| − | *It is possible that Malus shows curiosity more than anything. It seems that once Wander has reached Malus' |
+ | *It is possible that Malus shows curiosity more than anything. It seems that once Wander has reached Malus' upper body, it does not simply display an urge to destroy him anymore. |
==Gallery== |
==Gallery== |
||
| − | <gallery heights="180px" perrow="3" orientation="none" spacing="small" columns="3" widths=" |
+ | <gallery heights="180px" perrow="3" orientation="none" spacing="small" columns="3" widths="250"> |
Malus 1.jpg|Image of Malus taken from the official artbook. |
Malus 1.jpg|Image of Malus taken from the official artbook. |
||
MalusDistance.jpg|Wander hiding from Malus. |
MalusDistance.jpg|Wander hiding from Malus. |
||
| Line 115: | Line 119: | ||
16-Malus size chart.jpg|Size chart for Malus. |
16-Malus size chart.jpg|Size chart for Malus. |
||
Malus 5.jpg|The limited edition figurine of Malus released exclusively in Japan. |
Malus 5.jpg|The limited edition figurine of Malus released exclusively in Japan. |
||
| + | Malus face.jpg|A close-up of Malus' face. |
||
| + | SHADOW OF THE COLOSSUS_20180221104950.jpg|Malus trying to look at Wander. |
||
| + | SHADOW OF THE COLOSSUS_20180221091651.jpg|Malus aiming his hand at Wander. |
||
| + | SHADOW OF THE COLOSSUS_20180221104823.jpg|Wander standing on Malus's armor while looking into the rain. |
||
| + | SOTC Malus 3456789.png|Malus facing off with Wander |
||
| + | Malus bnm,.jpg |
||
| + | Malus Feet.jpg|Malus' feet |
||
</gallery> |
</gallery> |
||
{{Franchise}} |
{{Franchise}} |
||
{{SotCWalkthrough}} |
{{SotCWalkthrough}} |
||
| − | {{Sigildivider}} |
||
[[Category:Colossi]] |
[[Category:Colossi]] |
||
| + | [[Category:Shadow of the Colossus]] |
||
| + | [[Category:Shadow of the Colossus Characters]] |
||
| + | [[Category:Characters]] |
||
| + | [[Category:Bosses]] |
||
| + | [[Category:Enemies]] |
||
Revision as of 18:53, 29 May 2020
Malus is the nickname given to the sixteenth and final colossus, found atop a great mesa on the southernmost tip of the Forbidden Lands (quadrant F8). Unlike the other fifteen colossi, Malus lies beyond an area that is inaccessible until the previous fifteen colossi are defeated.
Path to the colossus
- See also: Map for this path
The sword's light will point due south, just like it did at the very beginning. The destination is much farther to the south, however. Start by going into the canyon passage just east of where the sword is pointing, as if going to Kuromori. Take a right when the path forks this time and the southern plains will be found. The sword will point to a distant mountain range - specifically, to a sealed door in the middle of the cliffs.
This door can only be opened by shining all eight beams of the sword's light on the seal in the middle of the door. For obvious reasons, the door thus cannot be opened until this point in the game. Once it opens, proceed, although it is highly recommended to visit the save shrine a short ways down the path.
Next to the shrine is a winding staircase that leads to a bridge. The walls of the mesa where Malus awaits is just ahead. However, this bridge is highly unstable and will collapse quickly if Wander sets foot on it, sending him plummeting to his death into the deep canyon below. Agro's speed is necessary to cross the bridge. Lead her up the stairs, position her as straight as possible, and charge.
A scene will play if done correctly: The bridge collapses quickly behind the pair, and it looks like they might make it across, when suddenly the final portion of the bridge gives way early. Agro, realizing she cannot make it, bucks Wander off of her to the safety of the other side, and Wander watches helplessly as his only companion throughout his entire journey falls into the river far below. Eventually, he stands up and looks up to the top of the mesa, where the wind is picking up, and storm clouds are already beginning to gather.
Start climbing the ridged walls. Maneuver up to the grass walls and climb up, then east. Once on solid ground again, find and enter the tunnel leading farther upwards.
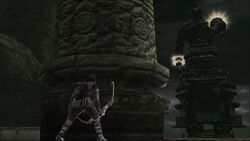
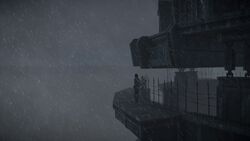
The storm is now in full swing as the player emerges outside onto a balcony. From here, the fifteen pillars of light where each colossus once stood can be seen, as can Wander's final opponent. Head up to the top of the mesa and climb either of the two ridged pillars on the sides of the balcony. As Wander slowly emerges from the canyon, a full view of the final boss is achieved.
Walkthrough
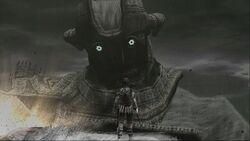
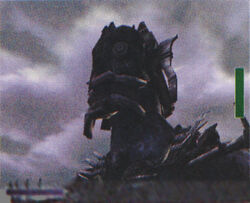
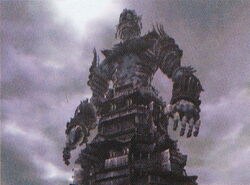
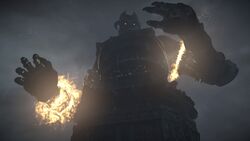
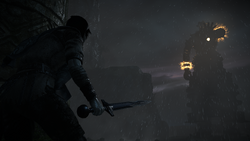
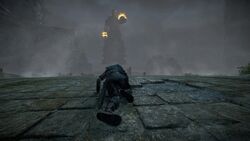
The last colossus is absolutely immense, even from the other side of the mesa where Wander begins. This is the only colossus that does not move, but what it lacks in mobility it makes up for in firepower. As soon as Wander walks up the steps leading to the battlefield, Malus will shoot deadly, high-speed projectiles at him from across the mesa, preventing him from approaching it directly. These make a distinct hissing sound when they are shot, but sometimes they can be hard to hear over the storm. Find cover quickly, or prepare to lose a huge amount of health.
Carefully approach the colossus using whatever cover found, and a series of underground tunnels is also helpful. Malus will know where Wander is at at all times and will shoot in his direction any time an opportunity arises. The dodge-roll move is useful here, but only to close the distance from cover to cover; the move cannot evade the projectiles on its own. Start by quickly going underground in the hole to the right; small fall damage may occur, but it's negligible compared to Malus' assault. Continue down the hallway and hug the right wall. Climb the boxes.
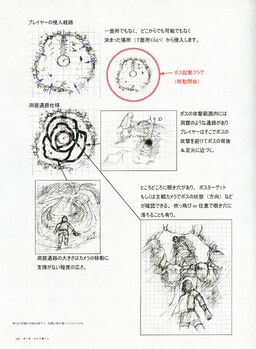
A concept version of this battle had Malus at the center of the arena. Wander had to reach the colossus through a maze of tunnels, with the occasional opening where Malus could shoot through. The design was ultimately scrapped in favor of a linear approach, but several elements of this early design can still be seen in the final game.
The next part is challenging: Wander must make his way up the ledge and behind the nearby cover without getting hit. Malus will shoot at him if he's hanging onto the ledge, but the projectile will miss. Use the opportunity to pull Wander up quickly and dive next to the wall, which should be reached right as another bolt hits. From here, make haste west from cover to cover; any mistake will knock Wander back into the trenches and damage him significantly. Health naturally regenerates slowly on its own, but if Wander crouches, it will regenerate faster. Dive into the hole at the end.
This tunnel leads out onto the western edge of the mesa, where Wander must make his way across some narrow ledges. Jumping from a ledge that divides Wander and his path is necessary. Quickly run to the next tunnel entrance. At the end is a broken staircase leading to another series of walls. These are farther apart than the previous set (and much closer to the colossus), so Wander must run from and into cover very quickly. Using the dive roll just before getting there is highly recommended.
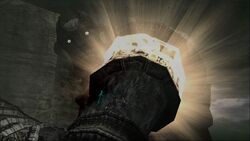
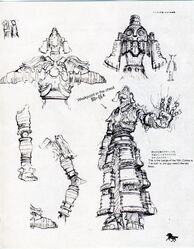
The tunnel here will bring Wander directly underneath the colossus, and it's time to climb. The bottom half of the colossus is climbed easily enough; just go from ledge to ledge, stopping to rest when Wander needs to regain grip strength. When Wander finally reaches the colossus' midsection, however, things get tricky. The Ancient Sword will indicate a vulnerable point on the colossus' back; stab it, and Malus will try and reach its backside with its left hand. Jump from the fur on the colossus' backside to the fur on its left palm. Once accomplished, the boss will bring its hand back to where it was before, but now with the hero clinging on. Surprisingly, if Wander falls, he won't die, but rather loses a huge amount of life. Climb to the back of the colossus' hand and lightly stab it; this will make Malus hold out its hand with the palm side facing down, examining the pest.
The next goal is a minor sigil on Malus' upper left arm (again, the sword will pinpoint it). Stab this, and Malus will try and cover this with its right hand. Jump off of its left arm and onto its right hand; hurry to the back of this hand and attack it to make the enemy hold it flat. From here, shoot an arrow onto the patch of fur on its shoulder, and Malus will cover this spot with the hand the player holds onto. All that remains is the final weakpoint, which is on the very top of its head.
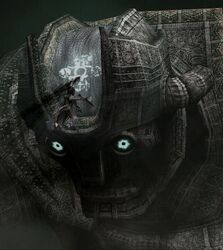
This is, of course, not an easy weakpoint to take out. Malus will try to shake Wander off very frequently and will often lean forward while doing so. Any slip here means a very long fall to the earth. There is only a single pause in Malus' fit where a full stab can be achieved, so don't even try until he stills (or see the final piece of tips and tricks); memorize his cycle. To make attacking this last weakpoint easier however, there is a useful trick. While on the colossus' shoulders, shoot or stab the patch of fur on its shoulder to make the colossus cover the injury with its hand again; this will leave its head perfectly still for a good few seconds. Its shoulders are a good place to recover stamina, even when the giant does everything in its power to shake Wander off.
Once the last sigil is destroyed, Malus will be no more. The final opponent defeated, Wander's goal accomplished and journey over, sit back and enjoy the ending and credits.
- Time Attack times in Original and PS3 versions (Normal, Hard): 9:30, 13:00
- Time Attack times in PS4 Remaster (Normal, Hard): 9:30/10:45
Weakspots
| Location | Percentage of health | |
|---|---|---|
| Normal | Hard | |
| On its head | 100% | |
| Lower back |
Used in climbing | |
| Upper left arm | Used in climbing | |
| Left shoulder |
Used in climbing | |
Tips and tricks
- Incredibly, it is actually possible to perform a very specific series of runs and jumps that will allow the player to run right up to the colossus, dodging over a dozen fireballs on the way there. The move is extremely difficult to pull off, but will also save the player quite a bit of time in Time Attack if they're looking to break their old record by several minutes.
- When on the fourth-largest section of Malus' garment discs, Wander is given an angle in which Malus' right shoulder can be shot from below. After shooting, Malus' right arm will extend closer to the ground, and upon climbing one level higher, the player will be able to jump directly to Malus' right hand on the return swing. This is also a great help in Time Attack.
- Once the player is on Malus' left arm, it is possible to time its movement so that Wander can just jump onto its chest-plate or shoulder. It's actually far easier to perform than it sounds, and it is very helpful on Time Attack.
- When Wander is attacking the sigil on Malus' head, the player can align him in such a way that he can repeatedly stab the sigil without losing his footing even once. To do this, Wander must be facing directly forward (the same direction Malus is facing) and charge up a powerful stab. When Malus leans forward, prepare another stab. Then, when Malus is throwing its head back in an attempt to dislodge Wander, the stab will be almost fully charged; stab it again. This pattern can be repeated multiple times until the colossus is dead.
Music
- As Wander opens the gate leading to Malus, "Sanctuary" plays.
- When Agro sacrifices herself to save Wander, "Resurrection" plays.
- When approaching Malus, "Demise of the Ritual" plays. This song plays throughout the entire battle with Malus.
Trivia
- Malus is the tallest of all the colossi by far; it is almost twice the height of the next-tallest colossi and over 30 times taller than Wander. Malus isn't the biggest colossus; Dirge is 260 ft/79.2m long, Hydrus is 280 ft/85.3m long, and Phalanx is 557 ft/169.8m long, making them all longer than Malus is tall. However, it is possible that Malus is the most massive and therefore the heaviest of all 16 colossi due not only to its great height but its enormous bulk.
- To give Malus' great height some scale, if Malus were real, then it would be tall enough to be able to look directly into the clock face of Big Ben.
- Malus is the only stationary colossus; it seems that its feet are bolted in place. Even when Malus is thrashing to try and dislodge Wander, its lower body remains completely motionless. This idea of Malus' feet being fixed in place is further evidenced when Malus dies, as it doesn't fall over to the ground, but rather slumps and bends back as low as the stone garment will allow. If its feet weren't stuck in the ground, Malus would have definitely toppled over and fallen, much like the other colossi.
- Of all the colossi, Malus is the most remote and is located further south than any other.
- The fight against Malus is the only battle which occurs in the rain.
- Malus is the last of four colossi that use long-range projectile attacks; not only is it unique in that it is the only bipedal colossus to attack in such a way, but it is also the only colossus that fires its long-range attack as singular shots. The other three colossi that use long-range projectiles (Kuromori, Basaran, and Pelagia) will fire three or four shots in one attack, whereas Malus will only ever fire one shot at a time. At the same time, its projectiles are the only ones that follow Wander. If the player can see them whilst moving, the projectiles even curve to change direction and strike Wander directly.
- Malus is the most human in appearance of all the colossi. This is probably for irony's sake; Wander has previously killed 15 monsters, deteriorating his appearance with each kill, and, by dispatching Malus, the most human-looking, loses the last of his aesthetic humanity.
- As well as being the most human in appearance of all the colossi, Malus sounds the most human in its roars and bellows as well.
- Malus is the last of three colossi that have their own exclusive track heard whilst fighting them. "Demise of the Ritual" is unique to Malus.
- Malus is the only colossus where the initial scaling of it can be considered a puzzle, as the player must do different things to get on different parts of its body, until getting up to the head. While all other colossi have puzzles that involve getting on them, none of them have a puzzle that involves actually climbing them.
- After Malus' intro movie, if Wander jumps to the lower ledges, the rain will vanish and the sky will be clear.
- In Time Attack mode, the player can jump off and land on the bridge.
- Malus is the only colossi to not fall to the ground upon defeat, aside from the ones fought in, (or in Avion's case, above) the water.
- After Wander surfaces from the final tunnel (the one that brings him directly under Malus), it can be seen that its legs are made of an odd black and yellow energy substance. Attacking these will result in one of its lightning meteor attacks being shot at Wander from its hand (meaning it shoots through its "stone garment")
- It is possible that Malus shows curiosity more than anything. It seems that once Wander has reached Malus' upper body, it does not simply display an urge to destroy him anymore.
Gallery
| The game | ICO ( Demo · Revisions from U.S. version · Ico HD ) | |
| Characters | Ico · Yorda · The Queen · Shadows · Shinkan | |
| The Castle | Idol Gates · Yorda's language · Saving Benches Altar • Warehouse • Spiral Stairs • Old Bridge • Stairs • Trolley 1 • Trolley 2 • Crane • Chandelier • Drawbridge • Main Gate • Graveyard • Dark Room • Sunbeams • Stone Pillar • East Crag • East Arena • East Idol Stairs • East Reflector • Waterfall • Sluice • Cogwheel • Gondola • Water Tower • West Crag • West Arena • West Idol Stairs • West Reflector • Cage • Pipe • Elevator • Wharf • Queen's Room • Sandy Beach | |
| Other Media | Ico ~Melody in the Mist~ · Official Game Guide · Ico: Castle in the Mist | |
 Walkthrough Walkthrough | |
|---|---|
| Characters | Wander · Mono · Agro · Dormin · Lord Emon · Guards · Shadows |
| Colossi | I · II · III · IV · V · VI · VII · VIII · IX · X · XI · XII · XIII · XIV · XV · XVI |
| Locations | The Forbidden Lands · Shrine of Worship · Colossus Arenas |
| Main Items | Power-ups (Lizards · Fruit) · Weapons (Ancient Sword · Sword of the Sun · Queen’s Sword · Sword of Dormin · Bow & Arrow · Ancient Bow · Harpoon of Thunder · Life Sword) · Collectibles (Relics) |
| Gameplay | Hard Mode · Save shrines · Time Attack · Reminiscence Mode · Watermellon · Barrel |
| Media | Roar of the Earth (OST) · Official Art and Guide Book · Nico Bonus DVD · Film · Interview Archive |
| Releases | OPM Demo · PS2 original · PS3 remaster · PS4 remake · Credits |
| Early Builds | Preview version · PSU Preview version · E3 Demo |
| Unused Content | Unused Colossi · Colossus Test Stages · Unused Locations · Beta Mountains · Development Timeline of Shadow of the Colossus |


