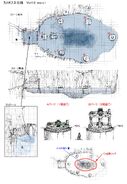
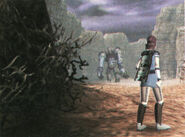
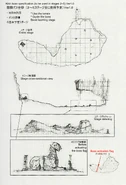
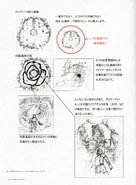
The Colossus Test Stages are the areas which served as a test for the colossi from Shadow of the Colossus, before they were placed on the Forbidden Lands and became proper arenas.
In total there are 26 Stages listed in the PS3 sheet data, two more than the planned 24 since Saru and Griffin were cut very early, but there's also a possibility that other early rejected stages were replaced. They are mostly numbered according to the order of their creation, having nothing to do with the order they are fought in. All of the textures listed in those stages' texture segments are present here in this page; and those that no longer exist (not found in any of the versions available) include the word 'unknown' and are blank.
Most of this is thanks to Wisi, who compared the colossi order in the sound effect parameters (seParam) to the stage order and figured out most of the colossi they belonged to.
Stage 01 - Proto[]
The stage of the Mammoth colossus. As the name implies, it was the prototype that would be the testing ground for all future arenas.
Stage 02 - Canyon[]
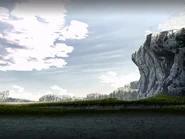
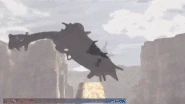
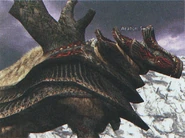
The stage of the Bird colossus. Aside from its resting pillar originally being made out of stone, not much else can be seen from the clips that were shown in the Nico bonus DVD trailer. Stage 02 includes a 'Sea' texture segment, which may imply the canyon had water since early on in development.
Stage 03 - Geyser[]
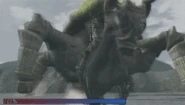
The stage of the Turtle colossus. It was an open geyser field not unlike its final location. However, a few dead plants and trees can be seen in early clips, which in the final location are only present in the cave entrance.
Stage 04 - Cave[]
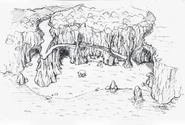
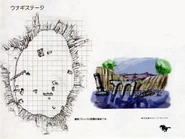
The stage of the Monkey colossus. The texture segment named 'st04a_saru_grid' as well as the stage name being visible in one of its pictures from the artbook, clearly indicate that this test area belonged to Saru (Monkey in japanese). The arena was never implemented on the map.
Stage 05 - Desert[]
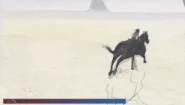
The stage of the Snake colossus. It was a vast desert very similar to the final arena. The ringed structures' textures are listed in this stage's texture segment, which indicates they were an early addition.
Stage 06 - Arena[]
The stage of the Knight colossus. No images of the test stage exists, so no differences can be noted. Multiple texture matches, as well as references to its early towers which used to surround the Arena, are some of the evidence pointing this stage to it.
Stage 07 - Valley[]
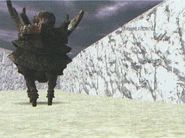
The stage of the Griffin colossus. Not much can be seen from its screenshots except really crude geometry. A "fire pillar" (oh_taimatsu) texture is present on the stage, and its textures are a exact match with the ones from the area named 'Valley'.
Several textures found in the temples from both Minotaur A and Minotaur B are also listed in the stage, but were then removed in its "Valley" model.
Stage 08 - Crater[]
The stage of the Phoenix colossus. Its test area included more "volcanic" textures compared to its later incarnation, which only has one volcanic rock texture. The textures listed in this stage are a clear indication of its owner.
Stage 09 - Underground[]
The stage of Yamori B. Its textures are a perfect match with the texture segment named 'YamoriB_test', and the boss is listed between Phoenix and Eel in the seParam. However, there's also another texture segment named 'st09_sluice_floor_camra_region', creating some confusion.
Since Yamori B is also named "Yamori2" and "Yamori Revision" in several data sheets, it may be possible that there was a previous version of a gecko boss which lived in the Sluice stage, before the idea was rejected and transferred to Stage 11, which became the home of the other gecko colossus.
Stage 9's textures include ones present in the temple which leads down into the arena from the final game (one of the textures is named "baiyon", which is the temple's real world inspiration), as well as water textures, meaning it's likely that a lake and the temple leading down the arena already existed in the test stage.
Stage 10 - Lakeside[]
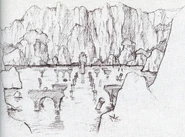
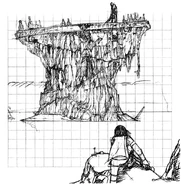
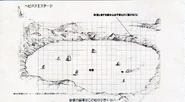
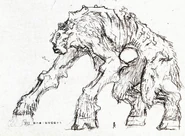
The stage of the Eel colossus. There are no screenshots of its early incarnation, so it's impossible to determine how much it changed. It most likely used to look similar to the concept art below however. The big bridge located in I2 seems to be an early version of the bridge at the entrance of its final arena.
Stage 11 - Sluice[]
The stage of Yamori A. Not much can be gathered by its textures, but this is Yamori A's correct stage as evidenced by the seParam. There's a possibility that Sluice was originally Stage 9 thanks to the texseg "st09_sluice_floor_camra_region", but was moved to Stage 11 after Yamori B's revision and given to Yamori A.
Yamori B's nickname interview from Famitsu contains some information on Yamori A.
"It was a Colossus that'd chase you while you were climbing the walls, and the strategy to defeat it was to grab onto its back with a backward-jump. I figured it would be pointless to show the same thing twice, so we finally narrowed it down to one."
Stage 12 - Hillock[]
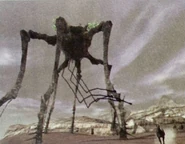
The stage of the Spider colossus. The textures listed in this stage are unhelpful as most of them no longer exist, however, a few of them are textures also used in Spider's legs. The seParam (sound effects parameters) lists Spider between Yamori A and Leo.
Stage 13 - Leo's Cave[]
The stage of Leo. Apart from its textures, the biggest difference was the lake which used to be much more expansive than its final incarnation. Several texture segments point to this stage being Leo's.
Stage 14 - Poseidon's Lake[]
The stage of Poseidon. No screenshots from the early version of this stage are available, so no differences can be noted. According to the arena's concept arts, it didn't change much from its final iteration. This colossus is the next in line after Leo in the seParam, which nails its stage number.
Stage 15 - Ruins[]
The stage of Cerberus. No screenshots from the early version of this stage are available, so no differences can be noted. Several interactable objects from Cerberus' arena are listed with the title 'st15a'.
Stage 16 - Dune[]
The stage of the Worm colossus. This stage only has two textures listed, with only one of them still existing (that being a sand texture). The other texture seems to have been another version of a rock wall that is seen throughout earlier versions of many deserted areas (hos_iwahada06g). The simplicity of this stage's textures seems to correlate with Worm's screenshots. The seParam lists Worm between Cerberus and Minotaur A.
Stage 17 - Temple[]
The stage of Minotaur A. The arena's main temple to be intact and it was possible to hide from the colossus under it, and the arena was a lot longer, with another temple structure at the end. Several lines from the sheets point to this stage being Minotaur A's.
Stage 18 - Stonehenge[]
The stage of Sirius. The arena was scattered with different types of stonehenge rocks, most of them broken, with only a few looking usable for the battle. Some of these rocks can still be found in the final version of the game. Sirius is listed between Minotaur_A and Kirin in the seParam.
Stage 19 - Kirin's Hill[]
The stage of Kirin. Besides the stage being way larger than the final location, the original idea of this area was to have hill-like mounds which Wander could climb and jump onto the colossus' "beard" or "tail". The resting spot of Kirin also had four towers surrounding it. Several lines from the sheets point to this stage being Kirin's.
Stage 20 - Labyrinth[]
The stage from the previous version of the 16th colossus, which used to be called Buddha. Only two unknown textures are listed in this stage, so no concrete link can be made. Buddha is listed between Kirin and Devil in the seParam however, separate from Evis. The likely scenario is that this was the discarded early arena for Buddha, named Labyrinth, before it became the final colossus in its new Sanctuary arena.
Stage 21 - Devil's Plain[]
The stage of the Devil colossus. It is not known how much of the arena changed as the only pictures available of Devil are from very late in development. Devil is listed between Buddha and Narga in the seParam.
Stage 22 - Gravewind[]
The stage of the Narga colossus. The early version of Narga's arena didn't have the cave from the final game, but it's unlikely it was still a test area in the screenshots provided of it. Its early shape can also be seen in its concept art. An old texture segment from Gravewind has a texture that references 'st22a'.
Stage 23 - Badlands[]
The stage of Roc. It is not known how much of the arena changed as the only pictures available of Roc are from very late in development. A texture from 'badlands_col' references 'st23a_wall'.
Stage 24 - Canossa[]
The stage of Minotaur B. The seParam lists Minotaur B between Roc and Minotaur C.
Stage 25 - Parthenon[]
The stage of Minotaur C. The seParam lists Minotaur C between Minotaur B and Evis. A model resembling an earlier version of the Parthenon exists in the Secret Garden from the E3 Demo. Most likely a part of the test stage was used for it as a placeholder.
Stage 26 - ???[]
The stage of the final colossus. This stage likely housed the earlier version of Evis before it was discarded and replaced with Buddha. There was once a low resolution model for a quadrant named "slow_evis" in the PS3 sheets, but it's unknown if it refers to this previous Evis or not. It's possible that this stage was never named.
seParam[]
The sound effects parameters sheet lists 24 colossi (except Monkey and Griffin, as they were nulled), seemingly in the same order as the stages.
| seParam Number | Colossus | Stage Number |
|---|---|---|
| 01 | Mammoth | Stage 1 |
| 02 | Bird | Stage 2 |
| 03 | Tortoise | Stage 3 |
| - | Saru | Stage 4 |
| 04 | Snake | Stage 5 |
| 05 | Knight | Stage 6 |
| - | Griffin | Stage 7 |
| 06 | Phoenix | Stage 8 |
| 07 | Yamori B | Stage 9 |
| 08 | Eel | Stage 10 |
| 09 | Yamori A | Stage 11 |
| 10 | Spider | Stage 12 |
| 11 | Leo | Stage 13 |
| 12 | Poseidon | Stage 14 |
| 13 | Cerberus | Stage 15 |
| 14 | Worm | Stage 16 |
| 15 | Minotaur A | Stage 17 |
| 16 | Sirius | Stage 18 |
| 17 | Kirin | Stage 19 |
| 18 | Buddha | Stage 20 |
| 19 | Devil | Stage 21 |
| 20 | Narga | Stage 22 |
| 21 | Roc | Stage 23 |
| 22 | Minotaur B | Stage 24 |
| 23 | Minotaur C | Stage 25 |
| 24 | Evis | Stage 26 |
| The game | ICO ( Demo · Revisions from U.S. version · Ico HD ) | |
| Characters | Ico · Yorda · The Queen · Shadows · Shinkan | |
| The Castle | Idol Gates · Yorda's language · Saving Benches Altar • Warehouse • Spiral Stairs • Old Bridge • Stairs • Trolley 1 • Trolley 2 • Crane • Chandelier • Drawbridge • Main Gate • Graveyard • Dark Room • Sunbeams • Stone Pillar • East Crag • East Arena • East Idol Stairs • East Reflector • Waterfall • Sluice • Cogwheel • Gondola • Water Tower • West Crag • West Arena • West Idol Stairs • West Reflector • Cage • Pipe • Elevator • Wharf • Queen's Room • Sandy Beach | |
| Other Media | Ico ~Melody in the Mist~ · Official Game Guide · Ico: Castle in the Mist | |
 Walkthrough Walkthrough | |
|---|---|
| Characters | Wander · Mono · Agro · Dormin · Lord Emon · Guards · Shadows |
| Colossi | I · II · III · IV · V · VI · VII · VIII · IX · X · XI · XII · XIII · XIV · XV · XVI |
| Locations | The Forbidden Lands · Shrine of Worship · Colossus Arenas |
| Main Items | Power-ups (Lizards · Fruit) · Weapons (Ancient Sword · Sword of the Sun · Queen’s Sword · Sword of Dormin · Bow & Arrow · Ancient Bow · Harpoon of Thunder · Life Sword) · Collectibles (Relics) |
| Gameplay | Hard Mode · Save shrines · Time Attack · Reminiscence Mode · Watermellon · Barrel |
| Media | Roar of the Earth (OST) · Official Art and Guide Book · Nico Bonus DVD · Film · Interview Archive |
| Releases | OPM Demo · PS2 original · PS3 remaster · PS4 remake · Credits |
| Early Builds | Preview version · PSU Preview version · E3 Demo |
| Unused Content | Unused Colossi · Colossus Test Stages · Unused Locations · Beta Mountains · Development Timeline of Shadow of the Colossus |

