No edit summary Tags: Visual edit apiedit |
(Cleaned up footer.) |
||
| (14 intermediate revisions by 7 users not shown) | |||
| Line 2: | Line 2: | ||
|ColossusTemplate = Yes |
|ColossusTemplate = Yes |
||
|ColossusText = |
|ColossusText = |
||
| − | |ColossusText2 = Thy next foe is... <br/> |
+ | |ColossusText2 = <p style="text-align: center;">Thy next foe is...<br/>An alter overlooks the lake...<br/>A guardian set loose...<br/>It keeps the flames alive. |
| − | An alter overlooks the lake... <br/> |
||
| − | A guardian set loose... <br/> |
||
| − | It keeps the flames alive. |
||
|Colossi Type = |
|Colossi Type = |
||
| − | |Height = |
+ | |Height = 12 feet (3.7 meters) |
| − | |Weight = |
+ | |Weight = |
| − | |Length = |
+ | |Length = 18 feet (5.5 meters) |
|Location = |
|Location = |
||
| − | |Sigils = Normal: 1 |
+ | |Sigils = Normal: 1 major <br/> Hard: 1 major|Resemblance = |Time Attack = 5:30/5:30 (Original, PS3)<br/>4:30/4:15 (PS4)|Agro = No|Developer Nickname = Leo/The Lion}} |
| − | '''Celosia''' is the nickname given to the eleventh [[The Colossi|colossus]], found in a small but deep canyon underneath the north end of the gigantic bridge at [[quadrant]] '''F1''' |
+ | '''Celosia''' is the nickname given to the eleventh [[The Colossi|colossus]], found in a small but deep canyon underneath the north end of the gigantic bridge at [[quadrant]] '''F1'''. |
| − | ==Path to the |
+ | ==Path to the colossus== |
{{See also|:File:Map colossus 11.jpg|l1=Map for this path}} |
{{See also|:File:Map colossus 11.jpg|l1=Map for this path}} |
||
<div style="float:left;">{{VideoSotC |Video - Path to Celosia|File:Shadow of the Colossus - 11th Colossus 1 2}}</div> |
<div style="float:left;">{{VideoSotC |Video - Path to Celosia|File:Shadow of the Colossus - 11th Colossus 1 2}}</div> |
||
| − | The canyon where Celosia dwells is at the north end of the enormous bridge. Head north from the [[Shrine of Worship |
+ | The canyon where Celosia dwells is at the north end of the enormous bridge. Head north from the [[Shrine of Worship]] and follow the bridge north until the canyon has been reached. To get to the bottom of the canyon, take the winding slope on the canyon's eastern rim, jump into the small pond below (be sure to aim for a deep spot), or use the [[Cloth of Desperation]] on [[Hard Mode|Hard]]. Once at the bottom, head west across (or around) the shallow lake. The temple to the west is the destination; the player can enter through a side passage to the right. After turning left and entering the temple, climb up some ledges to the right and jump across the gap to begin the battle. Try and jump as close as possible towards either of the walls. |
==Walkthrough== |
==Walkthrough== |
||
<div style="float:left;">{{VideoSotC |Video - Battle with Celosia|File:Shadow of the Colossus - 11th Colossus 2 2}}</div> |
<div style="float:left;">{{VideoSotC |Video - Battle with Celosia|File:Shadow of the Colossus - 11th Colossus 2 2}}</div> |
||
| − | After ten battles against enormous (and mostly slow) colossi, |
+ | After ten battles against enormous (and mostly slow) colossi, [[Wander]] now faces a colossus with the size and speed of a modern tank. Celosia will charge at Wander right from the start, so run for cover. There are four braziers set into the walls with gaps just big enough to dive into, so run here; at the very back, Celosia cannot reach Wander, despite it trying to claw at him. Climb to the top of a brazier and Celosia will ready a heavy charging attack to try and knock the player down to where they're vulnerable. This attack, however, will dislodge a burning torch from the fires. Pick it up right away (with {{R1}} in the [[Shadow of the Colossus|original]] or [[The ICO and Shadow of the Colossus Collection|PS3 port]], or {{R2}} on [[Shadow of the Colossus (PS4)|PS4]]), as Celosia is incredibly aggressive and will attack without hesitation. Climb back up the brazier, and strike the flame with the stick to light it. |
| − | Here, Celosia displays a fortunate weakness |
+ | Here, Celosia displays a fortunate weakness: It is afraid of fire and will back away fearfully from the burning torch if Wander carries it towards the colossus. The goal is to force it off the eastern ledge and into the canyon below. However, it's not as simple as that. To do this correctly, the player has to be walking slowly towards the colossus; if they go too fast and get too close, Celosia will attack with a quick swipe of its claws. Additionally, there is a limited amount of time before the torch burns out entirely, and the colossus will immediately charge again, forcing the player to repeat the process of knocking another torch down. A good strategy is to walk slowly toward it, but swipe at it with the burning board a few times before getting too close. Wander can even strike it on the face with the board. |
| − | + | After forcing Celosia off the ledge, a cutscene will play - the colossus will fall off the ledge a long way to the canyon floor, shattering its armor on impact. This exposes a patch of [[fur]] on its back and its [[Magic Sigil|weakspot]]. Jump down after it and don't worry about whatever fall damage Wander might take. If the player grabs its fur, the colossus will get back on its feet again and run around the canyon wildly, trying to buck Wander off and making a fully-charged stab all but impossible. Eventually it will run into the temple and leap back up to the original room. Thankfully, the earlier process of dislodging a torch and scaring the colossus off the ledge does not have to be repeated; jump on its back from atop a brazier after it charges. |
|
| − | : |
+ | :'''[[Time Attack]] time in Original and PS3 versions (both difficulties):''' 5:30 |
| + | :'''Time Attack times in PS4 Remaster (Normal, [[Hard Mode|Hard]]):''' 4:30, 4:15 |
||
==Weakspots== |
==Weakspots== |
||
<div style="background:#FFFFFF; border:#C9C9C9 solid 1px; -moz-border-radius: 2px; padding:0em; width:400px;"> |
<div style="background:#FFFFFF; border:#C9C9C9 solid 1px; -moz-border-radius: 2px; padding:0em; width:400px;"> |
||
| − | {| border=0 cellpadding=2 cellspacing=0 width=400 |
+ | {| border="0" cellpadding="2" cellspacing="0" width="400" |
| − | |- align=center |
+ | |- align="center" |
| − | ! rowspan=2 bgcolor=#CCCCCC width=50% | Location |
+ | ! rowspan="2" bgcolor="#CCCCCC" width="50%" | Location |
| − | ! colspan=2 bgcolor=#B7B7B7 | Percentage of health |
+ | ! colspan="2" bgcolor="#B7B7B7" | Percentage of health |
| − | |- align=center |
+ | |- align="center" |
| − | ! bgcolor=#8DBCB4 width=25% | Normal |
+ | ! bgcolor="#8DBCB4" width="25%" | Normal |
| − | ! bgcolor=#D67F62 width=25% | Hard |
+ | ! bgcolor="#D67F62" width="25%" | Hard |
| − | |- align=center bgcolor=#F9F9F9 |
+ | |- align="center" bgcolor="#F9F9F9" |
| On its back |
| On its back |
||
| − | | colspan=2 | 100% |
+ | | colspan="2" | 100% |
|} |
|} |
||
</div> |
</div> |
||
| − | ==Tips |
+ | ==Tips and tricks== |
| − | * |
+ | *During this battle, it is advised to avoid Celosia's attacks at all cost to prevent getting knocked to the ground, as this will cause Wander to be unconscious for few seconds. Usually, when Wander is about to recover, Celosia will charge again, and Wander will be knocked unconscious yet again for a few more seconds, repeating the process. Once this happens, Celosia will repeatedly knock Wander down until he's dead. |
| − | * |
+ | *After Celosia has been forced out of the altar and its armor has been shattered, it will remain stunned on the ground for quite some time. If the player is careful, Wander can jump straight off one of the cliffs and perform a "jump-stab attack" that will deal much more damage. |
==Music== |
==Music== |
||
| − | *Once Celosia lands on the temple floor and the fight begins, [ |
+ | *Once Celosia lands on the temple floor and the fight begins, [https://www.youtube.com/watch?v=YqNL0R8Vm9o "Liberated Guardian"] starts. |
| − | *Whilst holding onto Celosia, [ |
+ | *Whilst holding onto Celosia, [https://www.youtube.com/watch?v=gUVEZJs4RpY "A Despair-filled Farewell"] plays. |
==Trivia== |
==Trivia== |
||
| − | * |
+ | *Both Celosia and [[Cenobia]] are described by [[Dormin]] as "''a guardian set loose''". The song "Liberated Guardian" plays during both of these battles, as well as during the fight against [[Kuromori]]. |
| − | * |
+ | *In the [[Shadow of the Colossus official artbook and guidebook|''Shadow of the Colossus'' official artbook and guidebook]], Celosia is stated to represent a lion. |
| − | * |
+ | *Celosia is the only colossus which the player has to fight with a weapon other than the [[Ancient Sword|sword]] and the [[Bow & Arrow|bow]]: The burning torch. |
| − | * |
+ | *Celosia is one of only three colossi that are shown to be able to jump, the other two being Cenobia and [[Dirge]]. Along with Cenobia, it is also one of only two colossi that are ever seen running. |
| − | * |
+ | *Out of all the colossi, Celosia is the only one that shows any sign of fear, as it will back away from the lit torch. This is ironic given that Dormin said "''It keeps the flames alive''". |
| − | * |
+ | *Celosia is roughly the same size as an adult [http://en.wikipedia.org/wiki/African_elephant African elephant]. |
| − | * |
+ | *Some fans dislike Celosia (and Cenobia) because, after fighting much larger colossi previously, the battle against Celosia seemed less epic, not to mention the fact that it shows fear. A number of players have also complained that if Celosia knocks the player down, it is extremely difficult to get back up before Celosia charges and knocks Wander down again, meaning that getting knocked down once can very easily result in Wander being repeatedly knocked down until dead. |
| − | * |
+ | *Celosia makes a lot of very deep snorting and bellowing sounds, vaguely similar to the sounds a lion makes. |
| − | * |
+ | *Celosia and Cenobia are very similar in most ways. They are the smallest colossi, the most aggressive, fully armored and cannot be damaged until that armor is broken, both make lion-like sounds, and, obviously, their names are similar. However, Celosia is slightly more aggressive than Cenobia; if Wander is on top of a pillar, Cenobia will only attack once, then circle around or even walk away from the pillar until provoked, whereas Celosia will attack Wander regardless. Also, Celosia shows fear of fire, but it is unknown if Cenobia fears fire (or something else) as well. |
| − | * |
+ | *Celosia shares something in common with [[Argus]] in their descriptions by Dormin; Celosia is referred to as "''A guardian set loose...It keeps the flames alive...''", while Argus is described as "''It acts as a sentry to a destroyed city...''", and Dormin clarifies in these descriptions specific roles for both Celosia and Argus, namely that they are protectors of their respective environments. The same can also be said of Cenobia, although it is only ever referred to as "''A guardian set loose...''" like Celosia is; its role is never defined to the same extent as Celosia's or Argus'. |
| − | * |
+ | *Celosia is one of the most northerly of the colossi, with its lair being roughly as far north as both [[Hydrus|Hydrus']] and Argus'. |
| − | * |
+ | *While most players think that after Celosia falls off the cliff, it will get back up in seconds, it will really stay down for a long time. Wander could walk up behind it and jump onto its back. |
| − | * |
+ | **On the other hand, if the player decides not to attack Celosia immediately after it falls, it will get up and slowly walk back up the hill into the room across from the one in which the battle started. It will jump back to the original battle arena once it reaches this room. Even if the player initially pursues Celosia after it falls, but can get away and hide long enough, Celosia will stop charging and begin walking to the room. It is even possible for Wander to follow it and (possibly) jump onto its back from behind. |
| − | * |
+ | *Even if Wander has already shattered Celosia's armor, players can repeat the process of dislodging a torch and luring it off the edge. The same cutscene will play, though the music track will not silence nor will Celosia receive any additional damage. |
==Gallery== |
==Gallery== |
||
<gallery heights="180px" perrow="3" orientation="none" spacing="small" columns="3" widths="205" position="center"> |
<gallery heights="180px" perrow="3" orientation="none" spacing="small" columns="3" widths="205" position="center"> |
||
Celosia 4.jpg|Image of Celosia taken from the official artbook. |
Celosia 4.jpg|Image of Celosia taken from the official artbook. |
||
| + | Celosia ledge.jpg|Celosia preparing to leap into the battle. |
||
CelosiaWander.jpg|Wander facing Celosia. |
CelosiaWander.jpg|Wander facing Celosia. |
||
| ⚫ | |||
CelosiaFire.jpg|Celosia fearing the fire. |
CelosiaFire.jpg|Celosia fearing the fire. |
||
| ⚫ | |||
CelosiaCliff.jpg|Celosia falling off the ledge. |
CelosiaCliff.jpg|Celosia falling off the ledge. |
||
| + | Celosia fur.jpg|Celosia with its back armor broken off. |
||
CelosiaSigil.jpg|Wander stabbing Celosia's only sigil. |
CelosiaSigil.jpg|Wander stabbing Celosia's only sigil. |
||
| + | Celosia dead.jpg|Celosia collapses in defeat. Note how its eyes have gone black. |
||
CelosiaConceptArt.jpg|Concept art of the battle. |
CelosiaConceptArt.jpg|Concept art of the battle. |
||
Celosia 2.jpg|Development sketch of Celosia taken from the official artbook. |
Celosia 2.jpg|Development sketch of Celosia taken from the official artbook. |
||
11-Celosia size chart.jpg|Size chart of Celosia. |
11-Celosia size chart.jpg|Size chart of Celosia. |
||
</gallery> |
</gallery> |
||
| − | |||
| − | |||
| − | |||
{{Franchise}} |
{{Franchise}} |
||
| − | |||
{{SotCWalkthrough}} |
{{SotCWalkthrough}} |
||
| − | |||
{{Sigildivider}} |
{{Sigildivider}} |
||
[[Category:Colossi]] |
[[Category:Colossi]] |
||
| + | [[Category:Shadow of the Colossus]] |
||
| + | [[Category:Shadow of the Colossus Characters]] |
||
| + | [[Category:Characters]] |
||
| + | [[Category:Enemies]] |
||
| + | [[Category:Bosses]] |
||
Revision as of 19:52, 12 January 2020
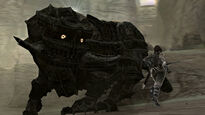
Celosia is the nickname given to the eleventh colossus, found in a small but deep canyon underneath the north end of the gigantic bridge at quadrant F1.
Path to the colossus
- See also: Map for this path
The canyon where Celosia dwells is at the north end of the enormous bridge. Head north from the Shrine of Worship and follow the bridge north until the canyon has been reached. To get to the bottom of the canyon, take the winding slope on the canyon's eastern rim, jump into the small pond below (be sure to aim for a deep spot), or use the Cloth of Desperation on Hard. Once at the bottom, head west across (or around) the shallow lake. The temple to the west is the destination; the player can enter through a side passage to the right. After turning left and entering the temple, climb up some ledges to the right and jump across the gap to begin the battle. Try and jump as close as possible towards either of the walls.
Walkthrough
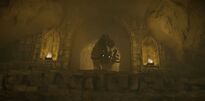
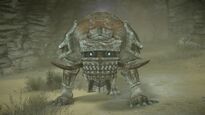
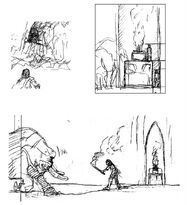
After ten battles against enormous (and mostly slow) colossi, Wander now faces a colossus with the size and speed of a modern tank. Celosia will charge at Wander right from the start, so run for cover. There are four braziers set into the walls with gaps just big enough to dive into, so run here; at the very back, Celosia cannot reach Wander, despite it trying to claw at him. Climb to the top of a brazier and Celosia will ready a heavy charging attack to try and knock the player down to where they're vulnerable. This attack, however, will dislodge a burning torch from the fires. Pick it up right away (with ![]() in the original or PS3 port, or
in the original or PS3 port, or ![]() on PS4), as Celosia is incredibly aggressive and will attack without hesitation. Climb back up the brazier, and strike the flame with the stick to light it.
on PS4), as Celosia is incredibly aggressive and will attack without hesitation. Climb back up the brazier, and strike the flame with the stick to light it.
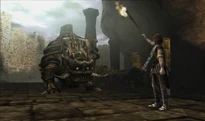
Here, Celosia displays a fortunate weakness: It is afraid of fire and will back away fearfully from the burning torch if Wander carries it towards the colossus. The goal is to force it off the eastern ledge and into the canyon below. However, it's not as simple as that. To do this correctly, the player has to be walking slowly towards the colossus; if they go too fast and get too close, Celosia will attack with a quick swipe of its claws. Additionally, there is a limited amount of time before the torch burns out entirely, and the colossus will immediately charge again, forcing the player to repeat the process of knocking another torch down. A good strategy is to walk slowly toward it, but swipe at it with the burning board a few times before getting too close. Wander can even strike it on the face with the board.
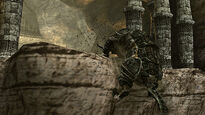
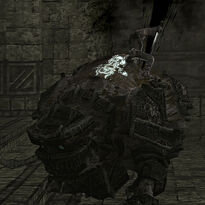
After forcing Celosia off the ledge, a cutscene will play - the colossus will fall off the ledge a long way to the canyon floor, shattering its armor on impact. This exposes a patch of fur on its back and its weakspot. Jump down after it and don't worry about whatever fall damage Wander might take. If the player grabs its fur, the colossus will get back on its feet again and run around the canyon wildly, trying to buck Wander off and making a fully-charged stab all but impossible. Eventually it will run into the temple and leap back up to the original room. Thankfully, the earlier process of dislodging a torch and scaring the colossus off the ledge does not have to be repeated; jump on its back from atop a brazier after it charges.
- Time Attack time in Original and PS3 versions (both difficulties): 5:30
- Time Attack times in PS4 Remaster (Normal, Hard): 4:30, 4:15
Weakspots
| Location | Percentage of health | |
|---|---|---|
| Normal | Hard | |
| On its back | 100% | |
Tips and tricks
- During this battle, it is advised to avoid Celosia's attacks at all cost to prevent getting knocked to the ground, as this will cause Wander to be unconscious for few seconds. Usually, when Wander is about to recover, Celosia will charge again, and Wander will be knocked unconscious yet again for a few more seconds, repeating the process. Once this happens, Celosia will repeatedly knock Wander down until he's dead.
- After Celosia has been forced out of the altar and its armor has been shattered, it will remain stunned on the ground for quite some time. If the player is careful, Wander can jump straight off one of the cliffs and perform a "jump-stab attack" that will deal much more damage.
Music
- Once Celosia lands on the temple floor and the fight begins, "Liberated Guardian" starts.
- Whilst holding onto Celosia, "A Despair-filled Farewell" plays.
Trivia
- Both Celosia and Cenobia are described by Dormin as "a guardian set loose". The song "Liberated Guardian" plays during both of these battles, as well as during the fight against Kuromori.
- In the Shadow of the Colossus official artbook and guidebook, Celosia is stated to represent a lion.
- Celosia is the only colossus which the player has to fight with a weapon other than the sword and the bow: The burning torch.
- Celosia is one of only three colossi that are shown to be able to jump, the other two being Cenobia and Dirge. Along with Cenobia, it is also one of only two colossi that are ever seen running.
- Out of all the colossi, Celosia is the only one that shows any sign of fear, as it will back away from the lit torch. This is ironic given that Dormin said "It keeps the flames alive".
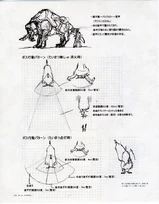
- Celosia is roughly the same size as an adult African elephant.
- Some fans dislike Celosia (and Cenobia) because, after fighting much larger colossi previously, the battle against Celosia seemed less epic, not to mention the fact that it shows fear. A number of players have also complained that if Celosia knocks the player down, it is extremely difficult to get back up before Celosia charges and knocks Wander down again, meaning that getting knocked down once can very easily result in Wander being repeatedly knocked down until dead.
- Celosia makes a lot of very deep snorting and bellowing sounds, vaguely similar to the sounds a lion makes.
- Celosia and Cenobia are very similar in most ways. They are the smallest colossi, the most aggressive, fully armored and cannot be damaged until that armor is broken, both make lion-like sounds, and, obviously, their names are similar. However, Celosia is slightly more aggressive than Cenobia; if Wander is on top of a pillar, Cenobia will only attack once, then circle around or even walk away from the pillar until provoked, whereas Celosia will attack Wander regardless. Also, Celosia shows fear of fire, but it is unknown if Cenobia fears fire (or something else) as well.
- Celosia shares something in common with Argus in their descriptions by Dormin; Celosia is referred to as "A guardian set loose...It keeps the flames alive...", while Argus is described as "It acts as a sentry to a destroyed city...", and Dormin clarifies in these descriptions specific roles for both Celosia and Argus, namely that they are protectors of their respective environments. The same can also be said of Cenobia, although it is only ever referred to as "A guardian set loose..." like Celosia is; its role is never defined to the same extent as Celosia's or Argus'.
- Celosia is one of the most northerly of the colossi, with its lair being roughly as far north as both Hydrus' and Argus'.
- While most players think that after Celosia falls off the cliff, it will get back up in seconds, it will really stay down for a long time. Wander could walk up behind it and jump onto its back.
- On the other hand, if the player decides not to attack Celosia immediately after it falls, it will get up and slowly walk back up the hill into the room across from the one in which the battle started. It will jump back to the original battle arena once it reaches this room. Even if the player initially pursues Celosia after it falls, but can get away and hide long enough, Celosia will stop charging and begin walking to the room. It is even possible for Wander to follow it and (possibly) jump onto its back from behind.
- Even if Wander has already shattered Celosia's armor, players can repeat the process of dislodging a torch and luring it off the edge. The same cutscene will play, though the music track will not silence nor will Celosia receive any additional damage.
Gallery
| The game | ICO ( Demo · Revisions from U.S. version · Ico HD ) | |
| Characters | Ico · Yorda · The Queen · Shadows · Shinkan | |
| The Castle | Idol Gates · Yorda's language · Saving Benches Altar • Warehouse • Spiral Stairs • Old Bridge • Stairs • Trolley 1 • Trolley 2 • Crane • Chandelier • Drawbridge • Main Gate • Graveyard • Dark Room • Sunbeams • Stone Pillar • East Crag • East Arena • East Idol Stairs • East Reflector • Waterfall • Sluice • Cogwheel • Gondola • Water Tower • West Crag • West Arena • West Idol Stairs • West Reflector • Cage • Pipe • Elevator • Wharf • Queen's Room • Sandy Beach | |
| Other Media | Ico ~Melody in the Mist~ · Official Game Guide · Ico: Castle in the Mist | |
 Walkthrough Walkthrough | |
|---|---|
| Characters | Wander · Mono · Agro · Dormin · Lord Emon · Guards · Shadows |
| Colossi | I · II · III · IV · V · VI · VII · VIII · IX · X · XI · XII · XIII · XIV · XV · XVI |
| Locations | The Forbidden Lands · Shrine of Worship · Colossus Arenas |
| Main Items | Power-ups (Lizards · Fruit) · Weapons (Ancient Sword · Sword of the Sun · Queen’s Sword · Sword of Dormin · Bow & Arrow · Ancient Bow · Harpoon of Thunder · Life Sword) · Collectibles (Relics) |
| Gameplay | Hard Mode · Save shrines · Time Attack · Reminiscence Mode · Watermellon · Barrel |
| Media | Roar of the Earth (OST) · Official Art and Guide Book · Nico Bonus DVD · Film · Interview Archive |
| Releases | OPM Demo · PS2 original · PS3 remaster · PS4 remake · Credits |
| Early Builds | Preview version · PSU Preview version · E3 Demo |
| Unused Content | Unused Colossi · Colossus Test Stages · Unused Locations · Beta Mountains · Development Timeline of Shadow of the Colossus |


